Great STEM Project
May the circuits be with you on May the 4th !!
More #MayThe4thBeWithYou fun in Innovation Club this morning with @Makerspaces_com light saber card paper circuits project! #ssdpride #warriorscreate #STEMed pic.twitter.com/vjNIG6R1Vl
— 𝓈𝒶𝓇𝒶 𝒻𝓇𝑒𝑒𝓂𝒶𝓃💻⚙️🔧💚 (@sara_freeman) May 4, 2021
Get The Paper Circuit Book & Kit
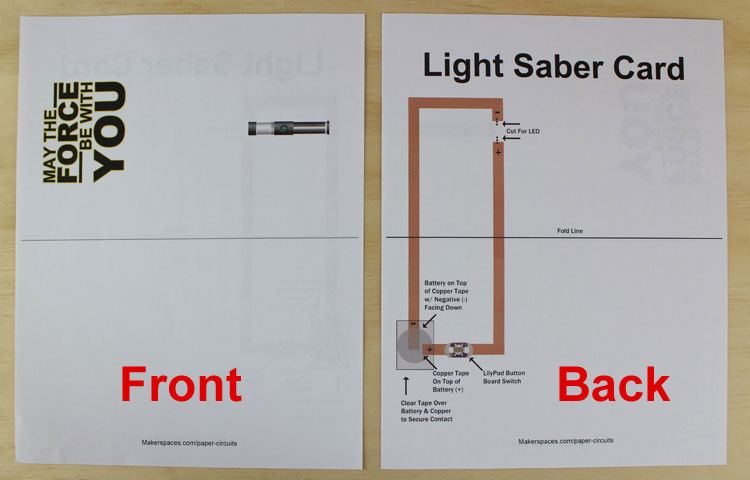
Step 1 – Print the paper circuit template
To begin, you will need to download & print the light saber paper circuit template. This template is a 2 page PDF.
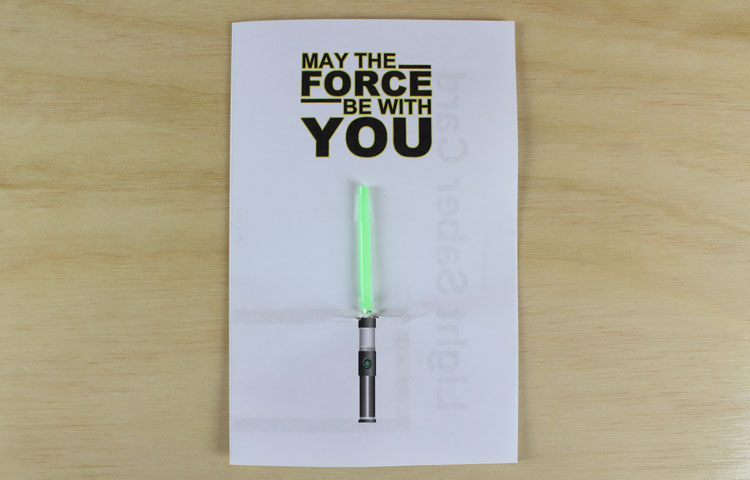
NOTE: Below is an alternate version of the light saber template that DOESN’T require button switches. This version uses the paper as a switch. See the Father’s Day light saber blog post for instructions on this version.
May The Force Template (No Button Switch) – PDF Download
May The Fourth Template (No Button Switch) – PDF Download
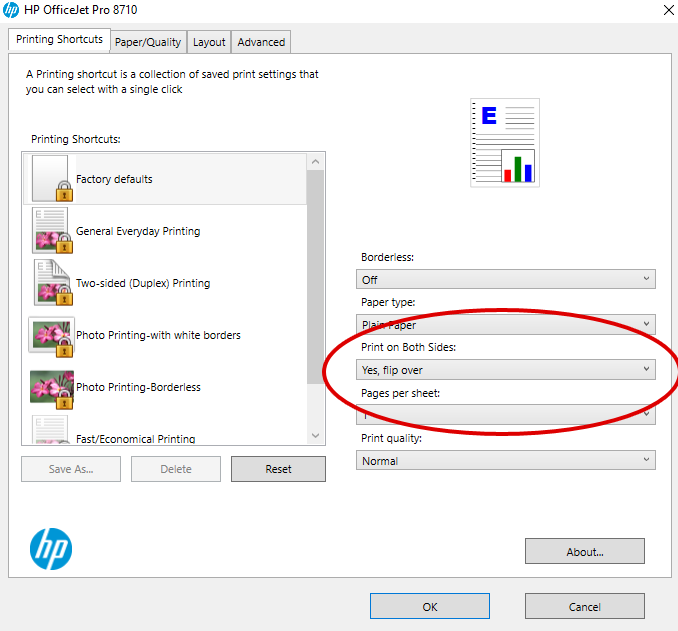
This project works best if you print on both sides of the paper. Many printers have this option and the setting can usually be found in the printer “properties” when printing.
Below is an example of where we found the setting using our printer.
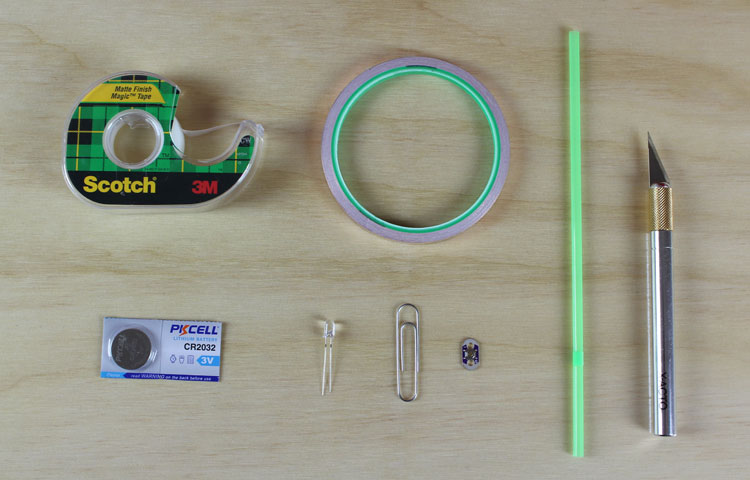
Step 2 – Paper Circuit Materials
Now we are ready to create the paper circuit that will energize our light saber. You will need to get the following materials:
- Conductive copper tape
- Transparent tape
- Coin cell battery -3v
- LED
- LilyPad button board
- Straw
- Scissors and/or Xacto knife
Buy The Paper Circuit Book & Kit
Step 3 – Apply Copper Tape
Let’s build a circuit ! Take your copper tape and apply it to the brown trace lines on the template. It’s always best to maintain a continuous strip of copper tape versus cutting it. When you come to corners fold at a 45 degree and then back 180 degree like shown in the photos. For more in depth details check out our paper circuit tutorial.

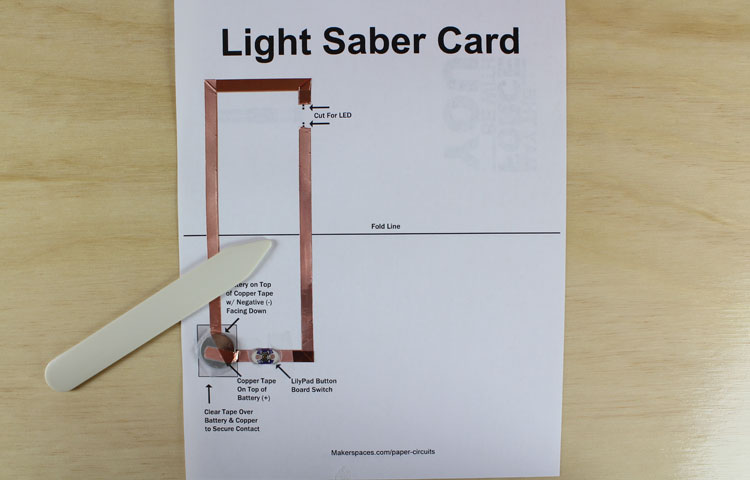
This is how the copper tape looks around the battery area. Only apply half of the tape at this point because the other half will need to stick to the top of the battery.
Step 4 – Mount The Battery & Switch
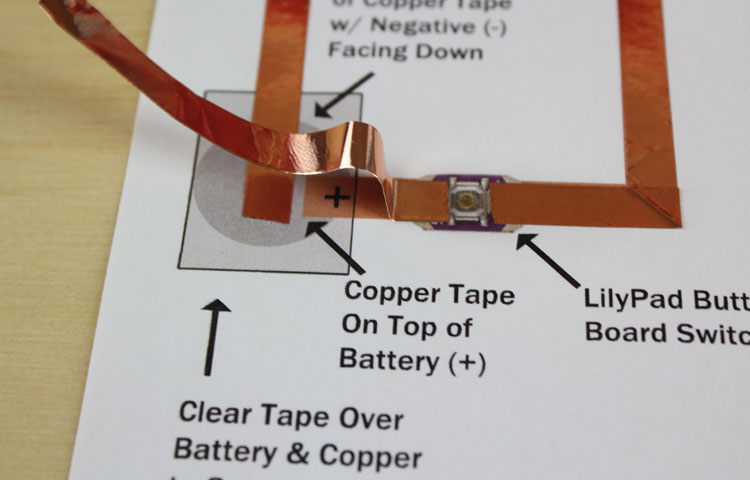
Put the coin cell battery on the grey circle area with the negative (-) facing down. Secure the loose copper tape to the top of the battery. Once that is complete you will need place the LilyPad button switch at the spot outlined on template.
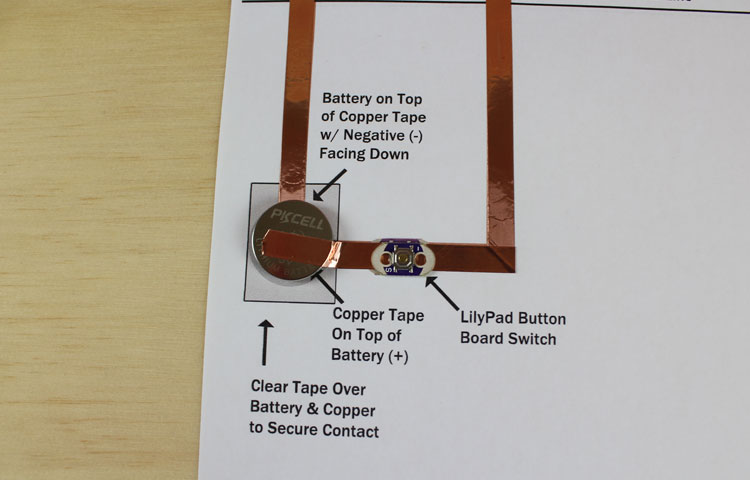
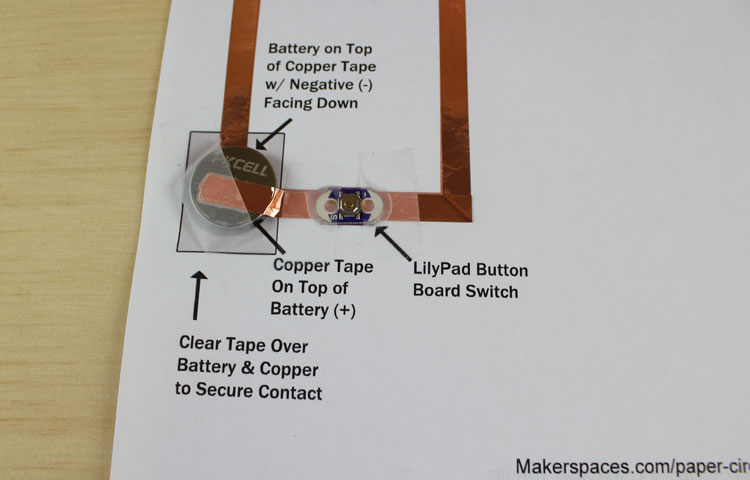
Once the battery and switch are in place, use transparent tape to secure them over. Make sure the switch and battery are contacting the copper tape firmly.
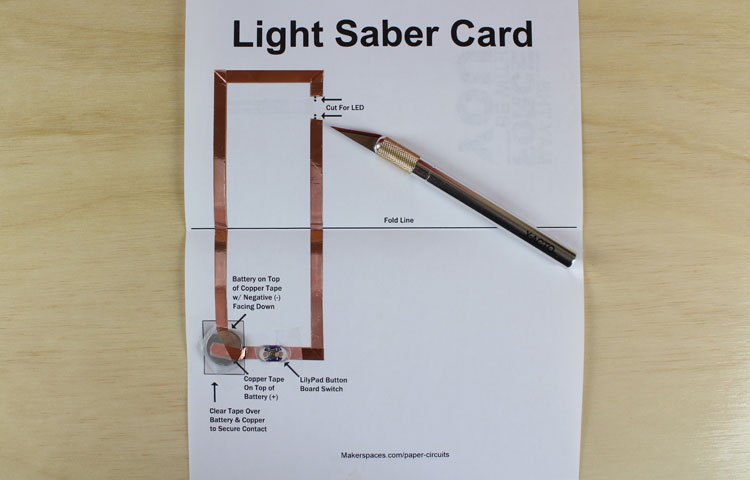
Step 5 – Fold Paper Circuit Template
Fold the template along the line.
Step 6 – Secure LEDs
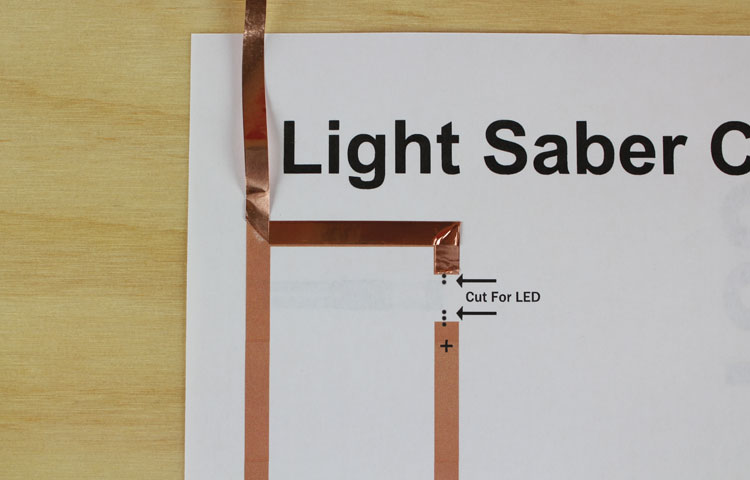
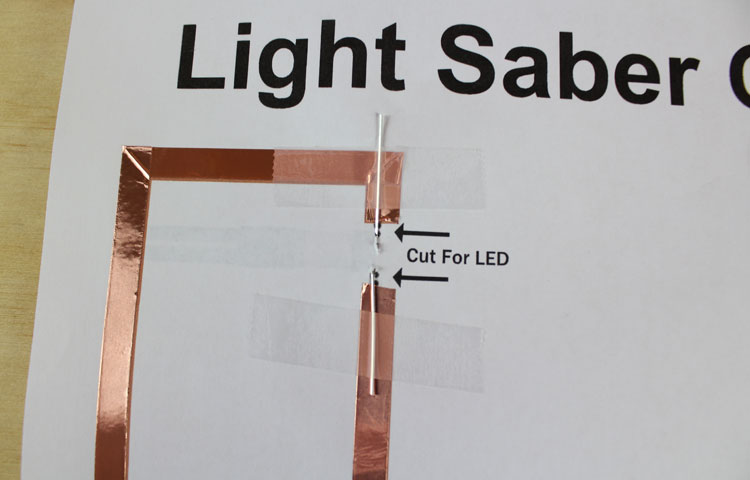
Cut the dotted lines. These slits will allow the LED legs to slide thru from the front.
Fold the template and insert the LED legs thru the holes. Note that one leg goes in each cut.
IMPORTANT – Make sure the positive leg (the longer one) goes thru the top cut and touches the positive copper trace. This photo is actually not correct because it shows the shorter leg on top.
Once the LED has been put thru the cuts, flip the template over and bend the legs so that they contact the copper tape. Again, make sure the positive LED leg is touching the positive side of the copper.
Once everything is in place you can tape down the legs with transparent tape. Make sure the legs are making firm contact with copper.
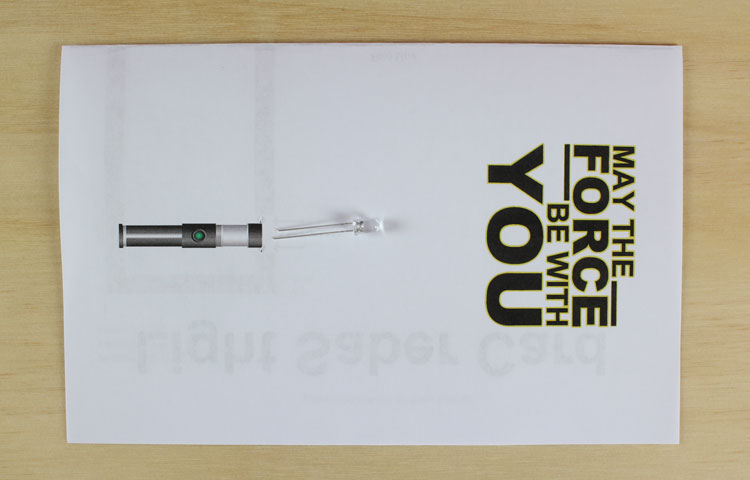
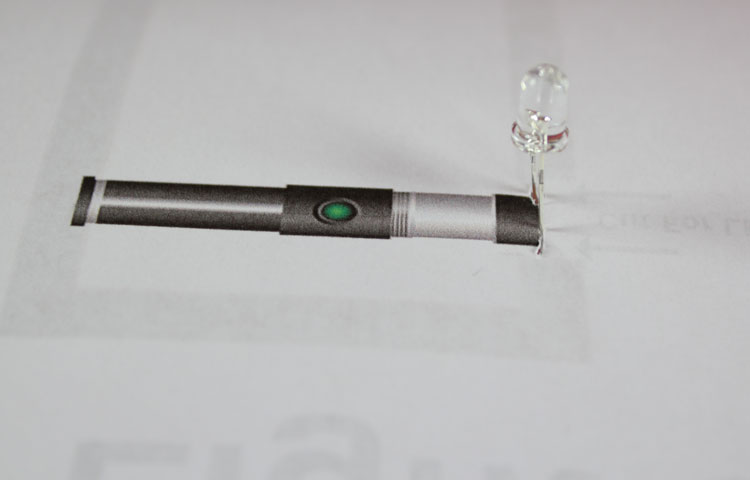
Step 7 – Add The Straw
Now it’s finally time to make this look like a light saber. Choose a color straw to match your LED color. You can use white LED but we find the color is richer when the LED and straw match.
Take the Xacto or scissors and slice 1/4″ on one edge of the straw. This is so the straw will fit over the LED. If the straw already fits then this step isn’t necessary.
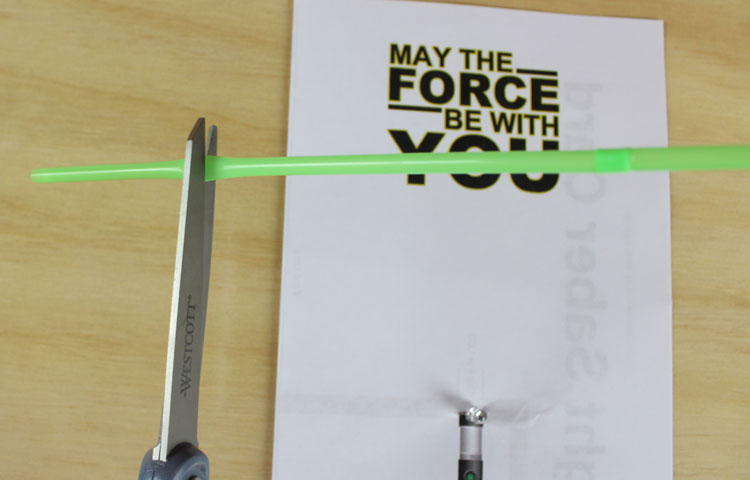
Next, cut the straw to about a 2″ length.
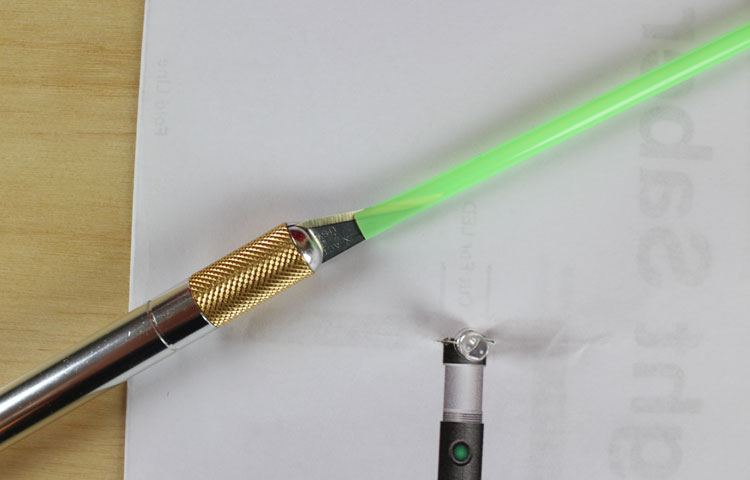
Place the straw over the LED.
Bend the LED/straw down towards the paper and then tape the straw in place.
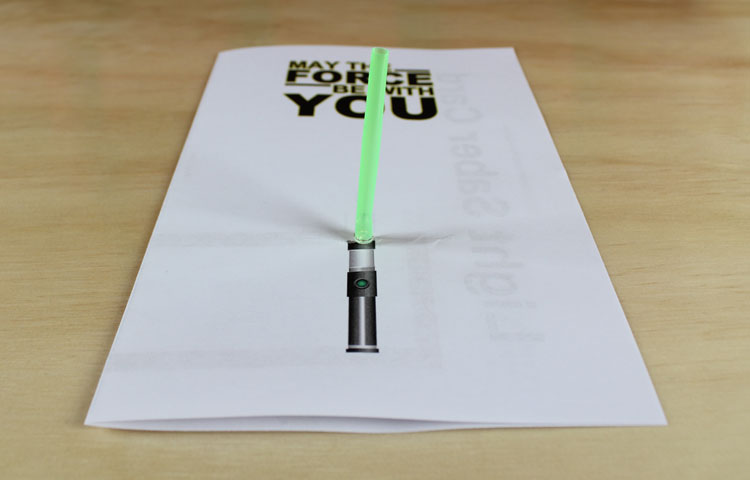
Step 8 – Be a Jedi !
45 More Paper Circuit Projects
Check out our ebook which contains over 45 printable paper circuit templates.