
Thanksgiving is a great time of the year to take a moment and give thanks, be grateful and of course learn how to create circuits.
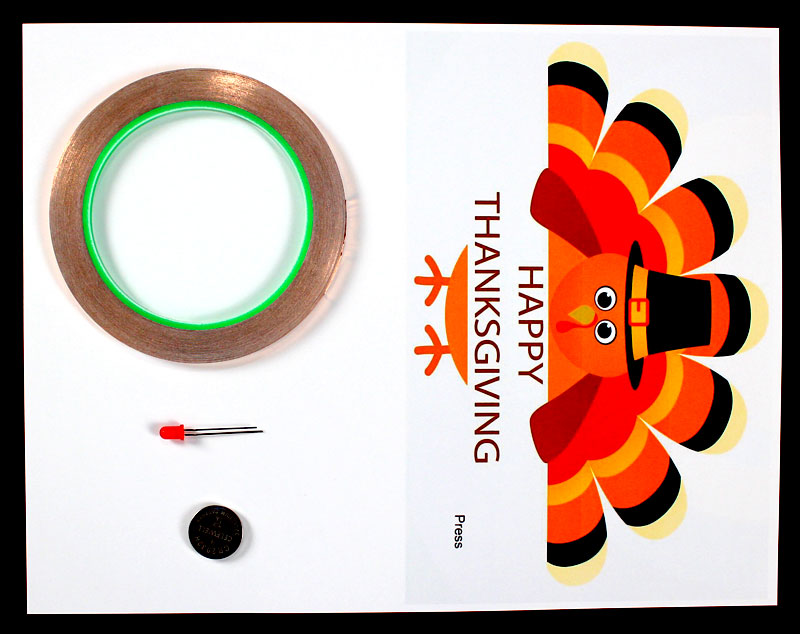
Using copper tape, an LED and a coin cell battery, you can create paper circuit light up cards. This is a great STEM project for all ages that teach the basics of electricity and the fundamentals of a simple circuit.
Great for groups of kids to do at home, school or even after Thanksgiving dinner. Each project only takes 15 minutes to complete and there are 7 templates to choose from.
FREE Download – 7 Paper Circuit Project Templates (PDF)


Materials Needed
FREE Download – 7 Paper Circuit Project Templates (PDF)
- Copper Tape w/ Conductive Adhesive
- (1) CR2032 Coin Cell Battery
- (1) LED – Any Size or Color
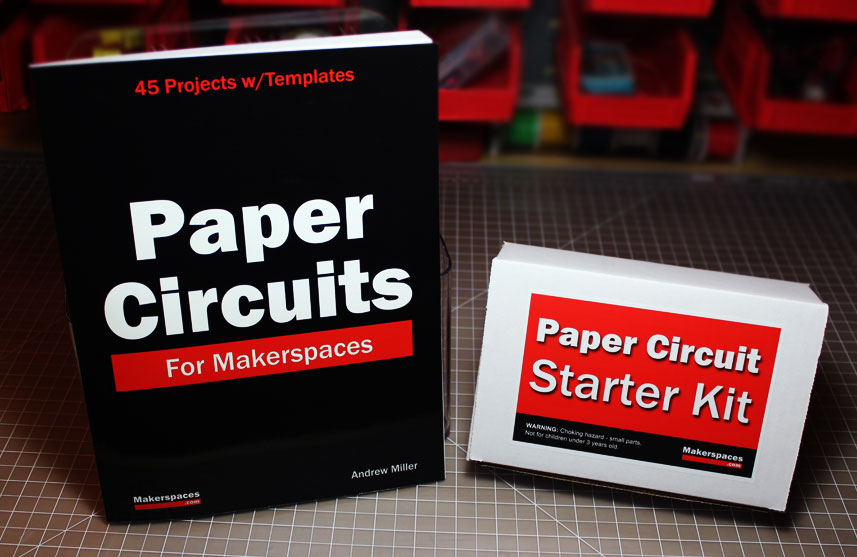
Need the materials for this project? We have a paper circuit starter kit & ebook available. The kit includes copper tape, LEDs and CR2032 batteries. Also included is a project ebook with 45 project templates.
Step 1 – Print The Template
Begin by downloading the free project templates at the link below. Once you have the templates, you can print them out.
FREE Download – 7 Paper Circuit Project Templates (PDF)
NOTE: Each project is two pages in length and we recommend using 2-sided printing if your printer has the capability. These projects will still work even if you need to print on two separate pieces of paper.

Step 2 – Apply Copper Tape
Once you have printed your template, you can begin applying the copper tape to the circuit lines.
We recommend using copper tape with conductive adhesive like the type we sell in our paper circuit kits. The conductive adhesive will allow you to apply the copper tape on top of copper tape at the corners and allow it to maintain its conductivity.
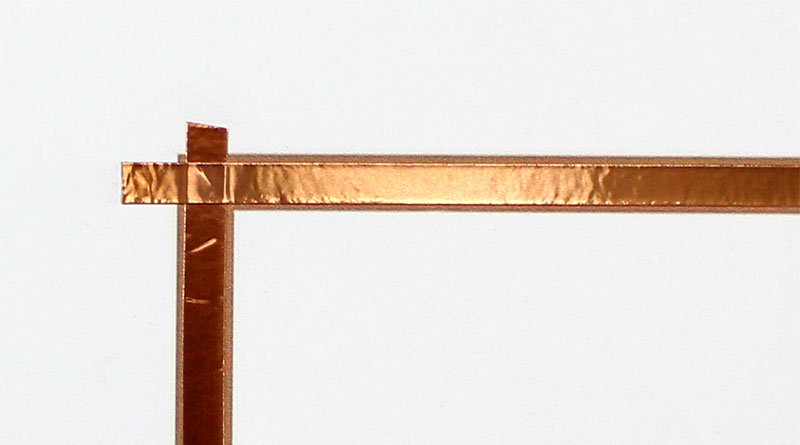
If your copper tape doesn’t have conductive adhesive, we recommend you keep the copper tape in a single piece and fold it at the corners instead of cutting it.
Begin by applying the copper tape along the brown line until you come to a corner.
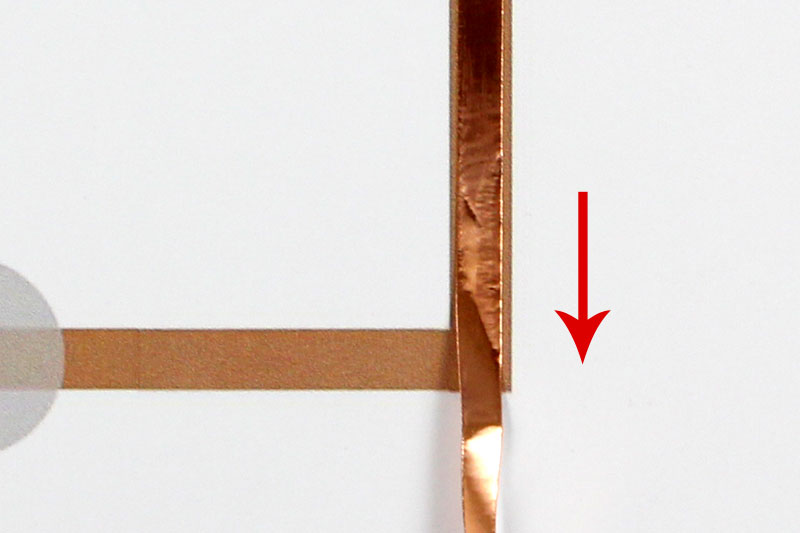
At the corner, fold your copper tape in the opposite direction in which you want to go.
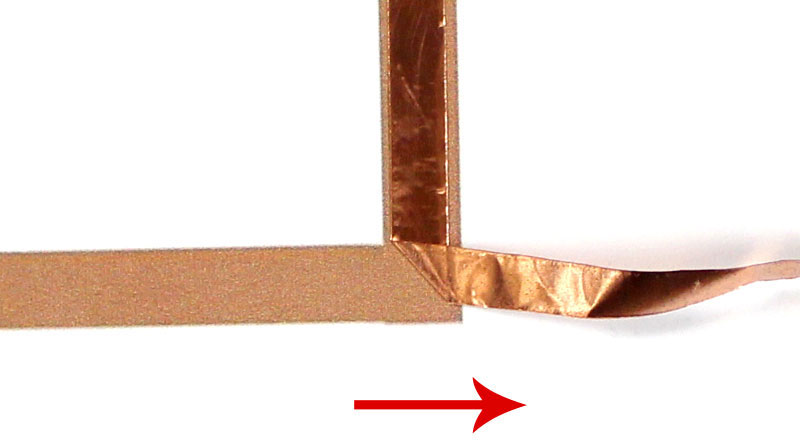
Using your fingernail, make an indentation in the copper tape and then fold it back along the brown line. Smooth all the tape down with your finger.
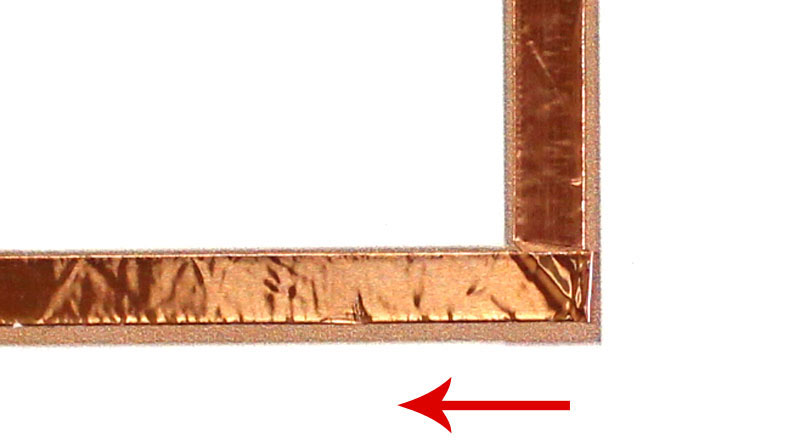
Make sure to add copper tape to every line on the template.
Step 3 – Fold and Cut
Flip your template over and cut an “X” in the area where the LED is going to push through.
After you made your cut, fold the template in half.

Step 4 – Attach The LED
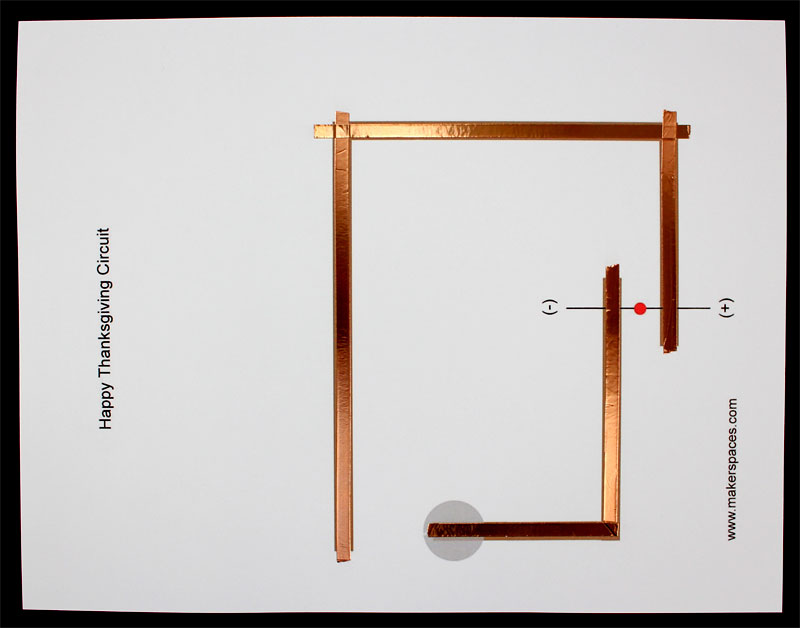
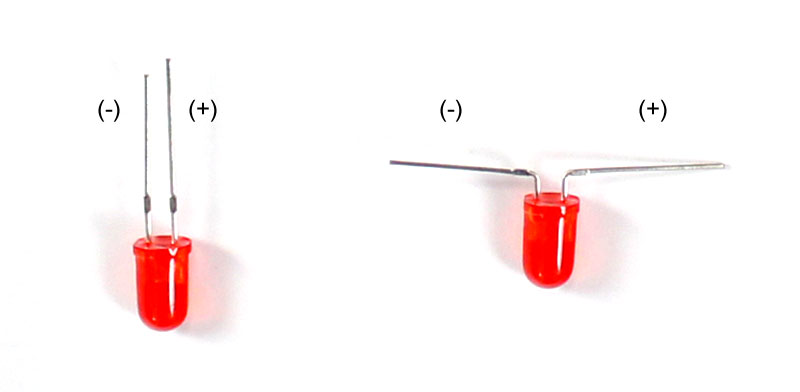
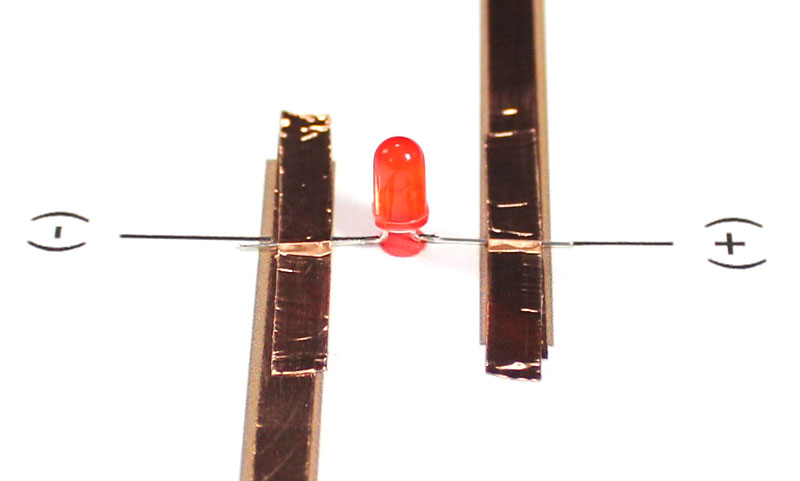
The next step is to attach the LED to the project template. Before you begin, make sure to note which leg of the LED is the long one as this is the positive (+) side.
Bend both legs of the LED at a 90 degree angle and attach it to the copper tape using small pieces of copper tape. Rub the connection points to ensure solid contact.
Make sure to attach the long leg of the LED to the side marked (+) on the template.
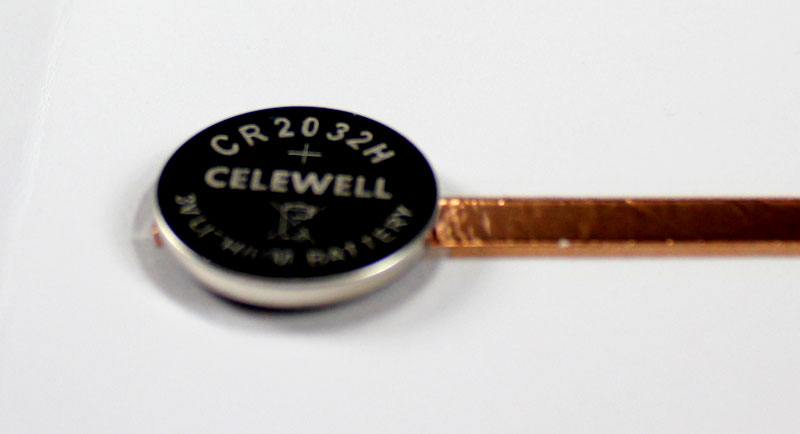
Step 5 – Mount The Battery
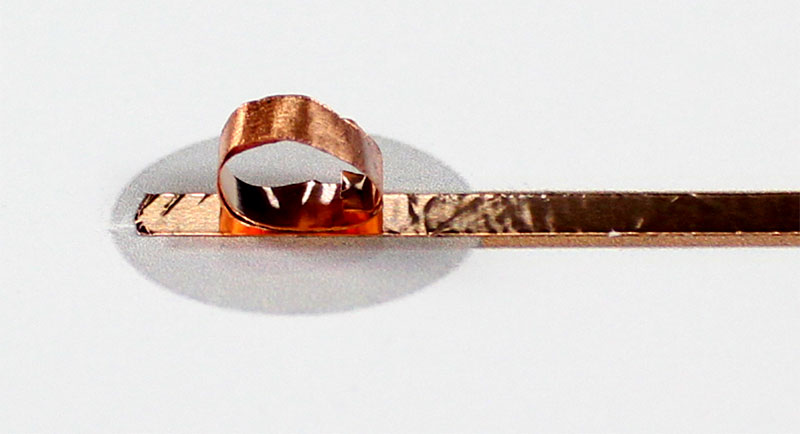
Now it’s time to attach the coin cell battery to the circuit. Cut a small piece of copper tape and roll it into a ball with the adhesive side facing out. Stick this ball to the copper tape inside the battery circle.
Mount your CR2032 coin cell battery to the copper tape ball with the negative (-) side facing down.
Step 6 – Test Your Circuit
Now it’s time to test your circuit and make sure it lights properly. Fold the template in half and push the LED through the cut you made earlier. Press the corner where it says “Press” to make it light up.

If for some reason your template doesn’t light, check the following:
- Make sure your battery works by connecting an LED directly to the battery. This is also a good way to test that your LED work.
- Ensure the battery (-) is facing down on the template.
- Verify that the long leg of your LED is on the side marked (+) on the template. Rub all connection points to ensure good solid contact.
Show Us Your Project
Follow us on Twitter at @Makerspaces_com and tweet us if you made this or another project. We love seeing your makerspaces and the creations you’re working on.
Need More Project Ideas?
Check out our makerspace blog for more paper circuit project ideas and templates. We also have a paper circuit starter kit and project ebook which has 45 project templates.