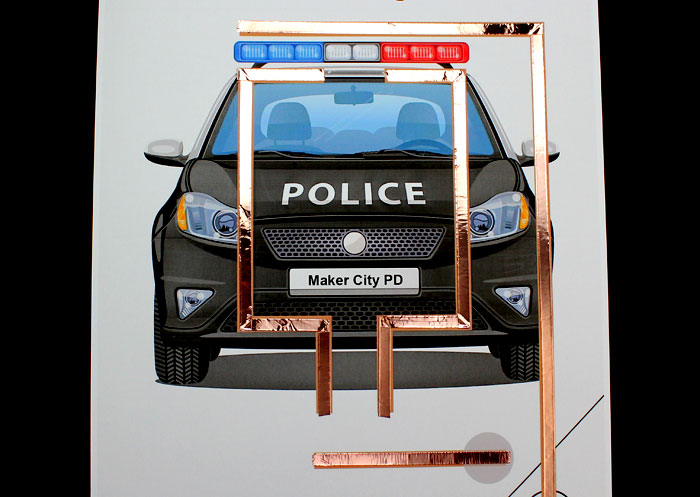
Maker City PD needs your help! Hackers have stolen a 3d printer from the local makerspace and the police can’t chase them until their lights are working.
Use this project tutorial to make flashing police car lights using paper circuits. You will need copper tape, LEDs and a coin cell battery.
This paper circuit project will also teach you about switches and how to create one using a paper clip.
The switch in this project is known as a SPDT or Single Pole Double Throw. A single source of power goes to this switch and yet it can control two separate LEDs at different times. This switch will allow us to make the police lights flash red and then blue.
Also included is a bonus fire truck template.

Project Time: 15 Minutes
Materials Needed
- Copper Tape w/ Conductive Adhesive
- (1) LED – Red
- (1) LED – Blue
- (1) CR2032 Coin Cell Battery
- (1) Paperclip – Jumbo size
- (1) Brass Fastener – 1-inch
- Police Car Project Template – PDF
- Fire Truck Project Template – PDF
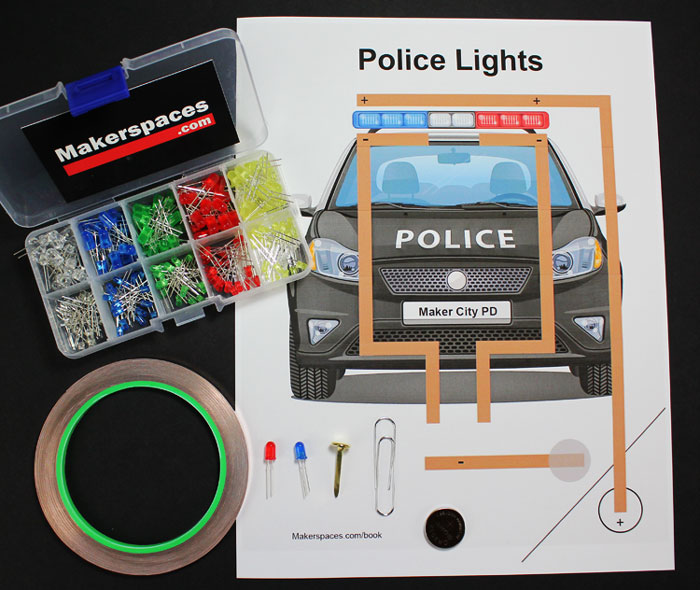
Need the materials for this project? We have a paper circuit starter kit & ebook available. The kit includes copper tape, LEDs and CR2032 battery. Also included is a project ebook with 45 project templates.
Step 1 – Print Project Template
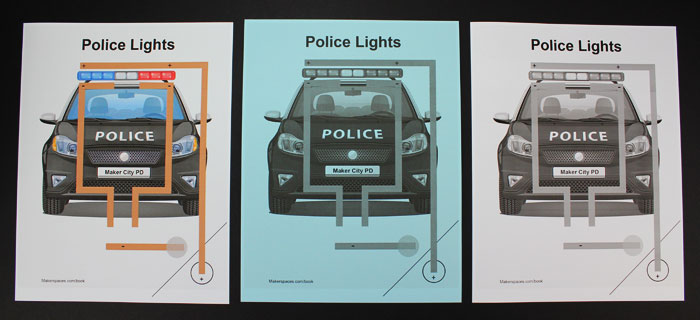
To start, you need to save and then print the police car project template.
This template is only 1 page in length and can be printed in full color or printed in black and white on colored or white paper to save printer ink.
Step 2 – Apply Copper Tape
Remove the backing on your copper tape and stick the tape on all the brown circuit lines throughout the template. Slide your finger along the tape to smooth it down on the paper.
NOTE: We recommend using a continuous piece of copper tape versus cutting it into multiple pieces. A single piece of copper tape will have better conductivity and will ensure the LEDs light.
If you do need to cut the copper, make sure it has conductive adhesive like the tape we sell in our paper circuit kits. This conductive adhesive will allow you to stick copper tape on top of copper tape and still work.
How To Fold Copper At Corners
Start by sticking the copper tape along the circuit lines until you come to a corner.

Next, fold the copper tape at a 45 degree angle.

The last step is to fold the copper tape 180 degrees in the opposite direction along the circuit line. It will help if you use your fingernail to make an indentation in the copper before folding it over.

Once all the tape has been applied, slide your finger along it to make sure it’s smooth and making good contact with the paper.
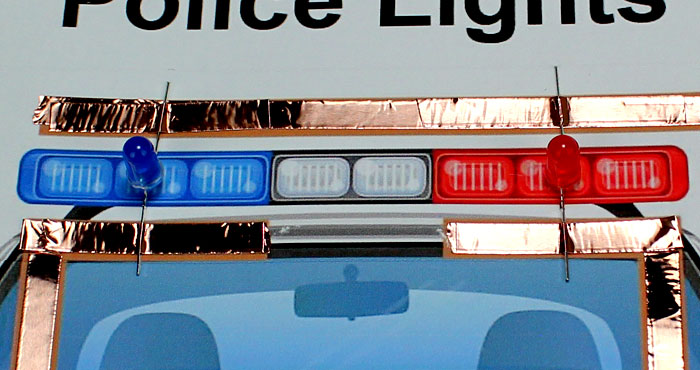
Step 3 – Attach The LEDs
To attach the LEDs, you will need to bend the legs at a 90 degree angle. Before you bend them, make sure you know which leg is the longest.
The long leg is positive (+) and will need to go on the copper tape marked with a plus sign on the template.
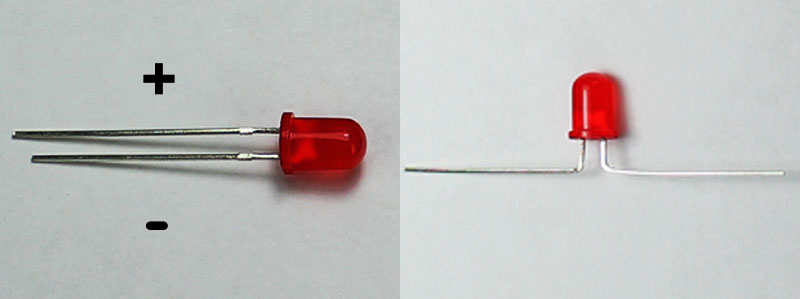
Using small pieces of copper tape, mount the LED to the circuit. Make sure the long leg of the LED is being attached to the (+) side. Do this with both the red and the blue LED.
Rub your finger along the leg and copper tape to ensure they are making good contact.
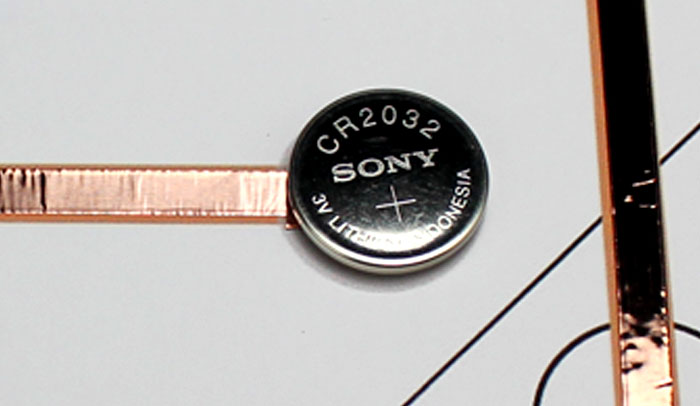
Step 4 – Mount The CR2032 Battery
Cut a small piece of copper tape around 2 inches long. Roll the tape into a ball with the sticky adhesive on the outside. Stick the roll of tape to the copper tape inside the battery circle.

Place your CR2032 coin cell battery on top of the copper tape roll. Make sure that the negative (-) side of the battery is facing down on the circuit.
NOTE: Make sure the copper tape is only touching the very bottom of the battery which is (-) negative. The sides and top of the battery are positive.
Step 5 – Fold The Corner
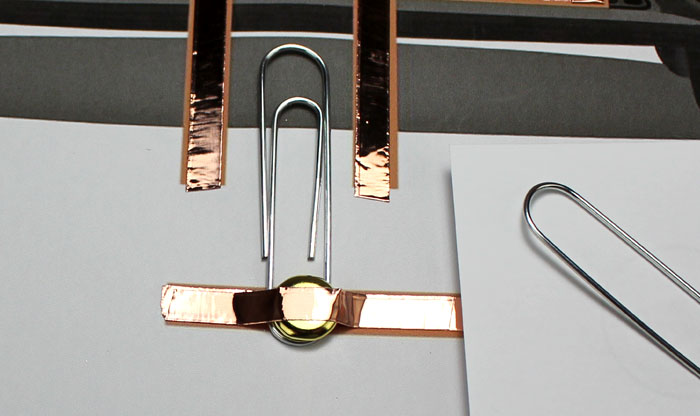
Fold the bottom right corner of the template along the line so it covers the battery. Use a paper clip to secure the corner to the top / positive (+) side of the battery.

Step 6 – Mount The Paper Clip Switch
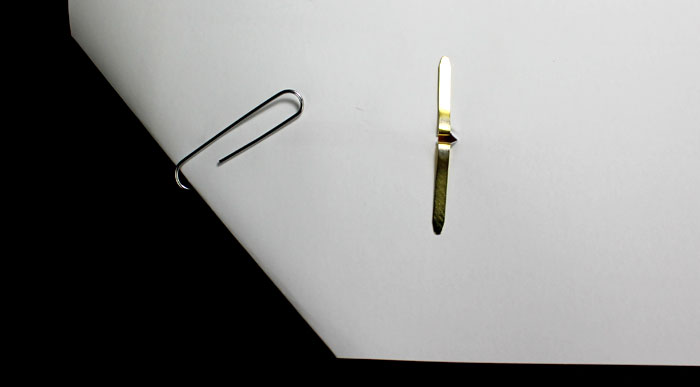
Using scissors or a razor blade, make a small hole or slit through the middle of the copper tape that’s connected to the battery negative. Take a brass fastener and stick the legs through one end of the paper clip and then stick the legs through the hole you made in the copper tape.
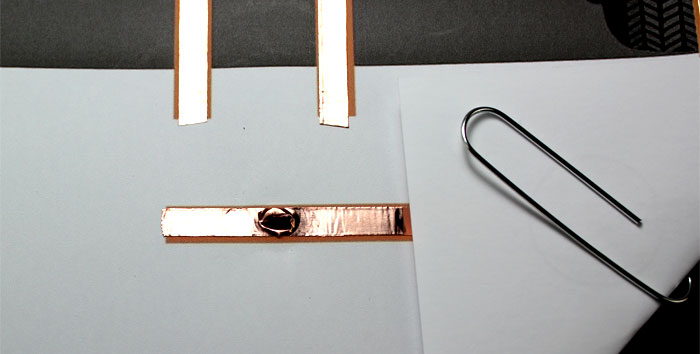
Flip the template over and open the fastener so it’s secured on the back.
Flip the template back over. Take a small piece of copper tape and apply it over the brass fastener and onto the copper tape circuit. This will help make sure your paper clip doesn’t fall off and will also help with conductivity to the switch.
NOTE – Instead of a paper clip, you could also use a 3 inch piece of copper tape for the switch. Leave the backing on the tape and flip it over so the copper side is facing down. Connect it the same way as you did with the paper clip using the brass fastener. Do an experiment to see which switch works best.
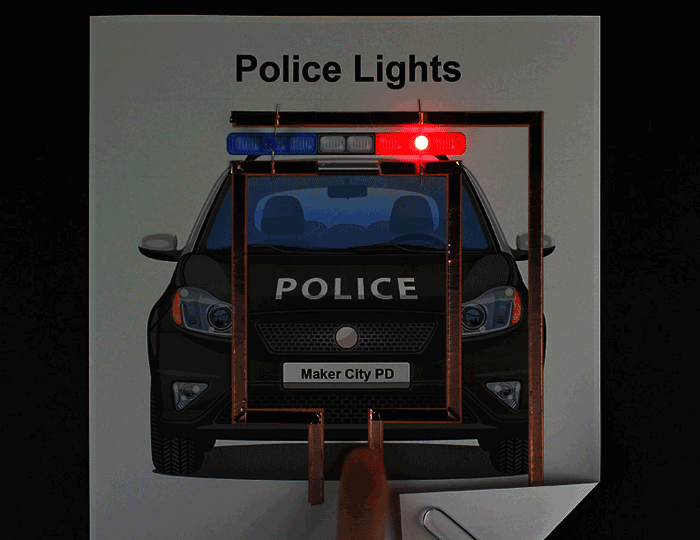
Step 7 – Test Your Circuit
At this point you’re done and it’s time to test your circuit. Put your finger on the paper clip and move it from side to side. Once your paper clip makes contact with the copper tape it should light up.
Show Us Your Project
Follow us on Twitter at @Makerspaces_com and tweet us if you made this or another project. We love seeing your makerspaces and the creations you’re making.
If you’re looking for more paper circuit projects, please check out our ebook which has 45 project templates.