
This tutorial will show you how to create a custom Mothers Day card that lights up. Give your Mom something special and unique while learning about simple circuits and the basics of electricity.
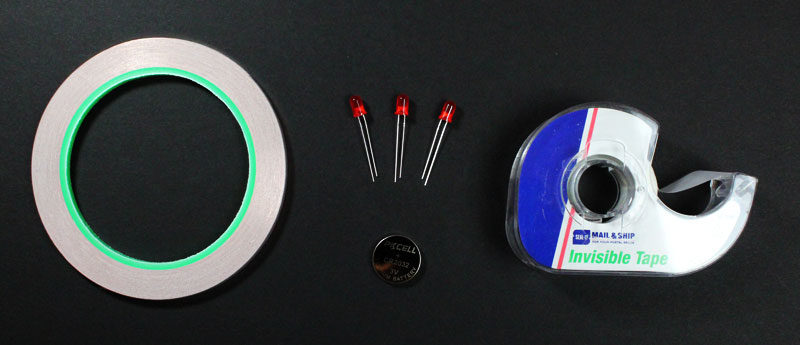
This project is based on paper circuits which uses conductive copper tape, LEDs and a battery to bring your card to life.
Once complete, you can use the concepts learned to create your own custom light-up card.
Project Time: 15 minutes
Need the materials for this project? We have a complete paper circuit starter kit & ebook available. This kit comes with the materials needed for 10 paper circuit projects. The ebook has 45 projects w/ printable templates.
Paper circuit classroom packs are also available.

Step 1 – Print Project Templates
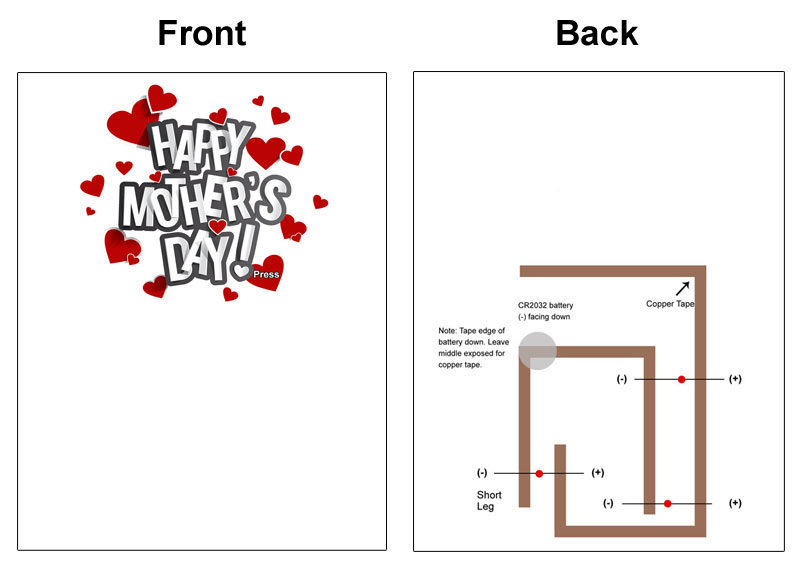
The first thing you need to do is download and print the Mothers Day card template. This template is two pages and it’s best to print it on one sheet of paper (front & back). This project will still work with 2 sheets of paper if your printer doesn’t offer 2-sided printing.
Download Project Template
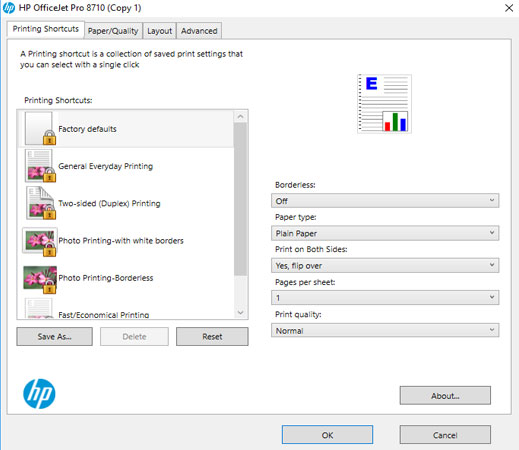
For two-sided printing, view your printer’s properties for the settings.
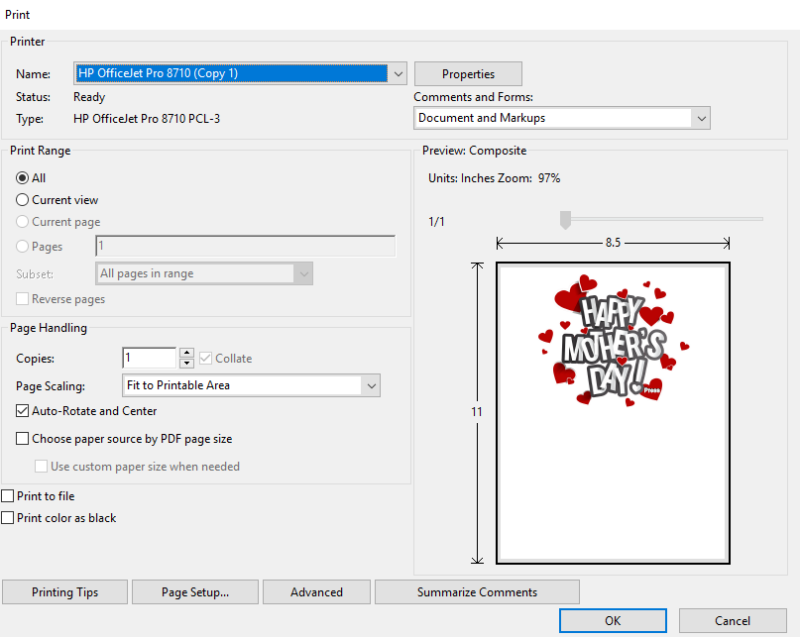
Once properties is open, select the “Print on both sides” option and then choose “Flip over”.
Step 2 – Apply Copper Tape
Apply the conductive copper tape to all the area marked in brown on the template. It is best to keep the copper tape in one piece and fold it at the corners versus cutting it. Keeping the tape in one piece will increase its conductivity.
Learn how to fold the copper at the corners by viewing our post on paper circuit basics.

Step 3 – Fold The Template
After you have added the copper tape, you will need to fold the template in half.

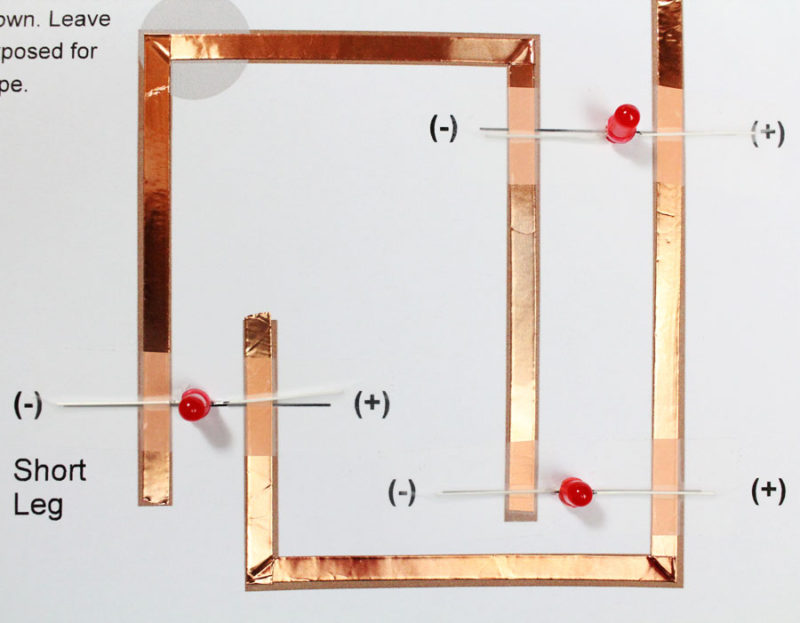
Step 4 – Add LEDs
Now we’re ready to add LEDs to the paper circuit template. Bend both legs of the LED at a 90 degree angle. Make sure you note which leg is the longest because this is your positive (+) leg. If you look closely to the LED, you will also notice that one side is flat. This is the negative (-) side.
Tape the positive leg of the LED to the copper tape with the (+) noted beside it. Do the same with the (-) or short leg of the LED. Make sure to rub the transparent tape really well so you ensure it’s making contact with the copper below.
Repeat this will all (3) LEDs.
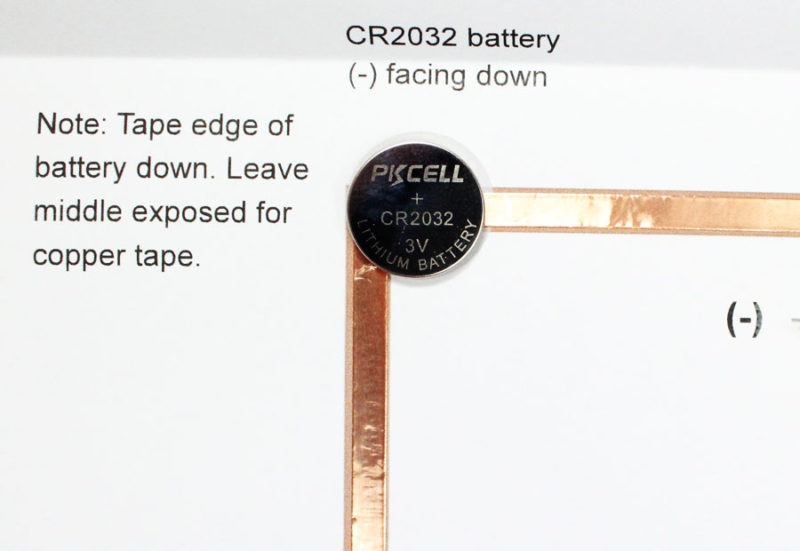
Step 5 – Mount The Battery
Place (1) coin cell battery on top of the copper tape where the grey circle is located. Make sure the negative (-) side of the battery is facing down.
Tape the edges of the battery to the template. Make sure the middle of the battery is exposed so the copper tape can contact it when the template is folded.
Step 6 – Happy Mothers Day !
Fold the template and make small cuts in the hearts where the LEDs are. Make little “X’s” so the LEDs can fit through.

Share Your Projects
Hope you had fun with this project !
Follow us on Twitter at @Makerspaces_com and show us how your card turned out.
