
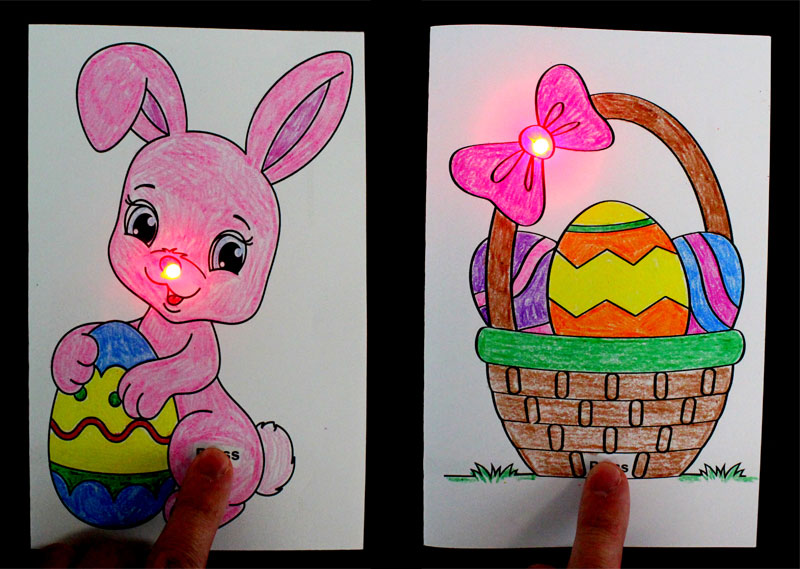
Celebrate the Easter holiday by making these really cool light up paper circuit cards.
This is a fun and easy project that helps you learn the basics of electricity and circuits.
Included with this tutorial are (3) FREE project templates in PDF format.
Project Time: 15 Minutes
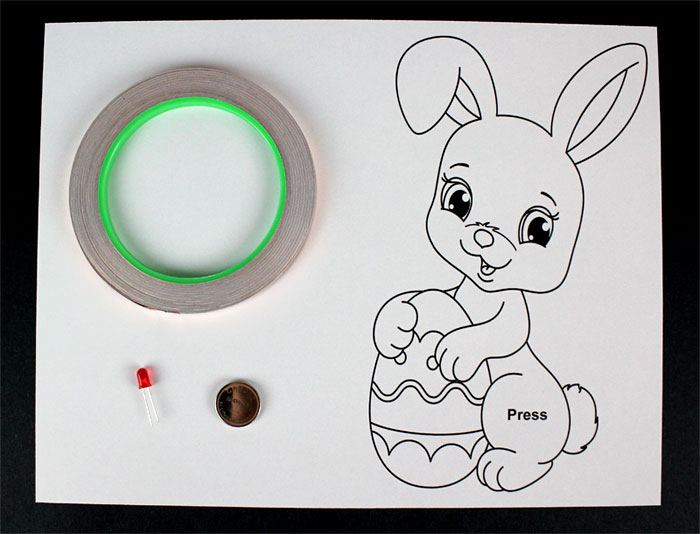
Materials Needed
- (1) LED – Any Color
- (1) CR2032 Coin Cell Battery
- Copper Tape w/ Conductive Adhesive
- Bunny Template – PDF
- Easter Basket Template – PDF
- Happy Easter Template – PDF
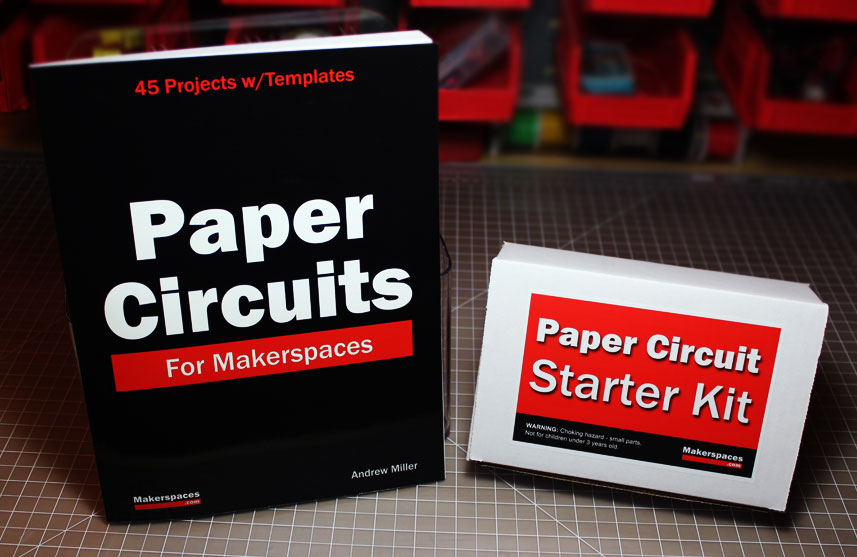
Need the materials for this project? We have a paper circuit starter kit & ebook available. The kit includes copper tape, LEDs and CR2032 batteries. Also included is a project ebook with 45 project templates.
Step 1 – Print Project Templates
To begin, you will need to select the template you want to use and download it using the link below.
NOTE – Check out our blog for other free holiday and paper circuit templates
Once you have selected your Easter template, print it on white or colored paper. These designs come in black and white outline and are great for coloring with crayons, pencils or markers.
Each Easter template is 2 pages and we recommend that you use two-sided printing if your printer has the capability. This project will still work fine if you need to print on 2 separate sheets of paper.
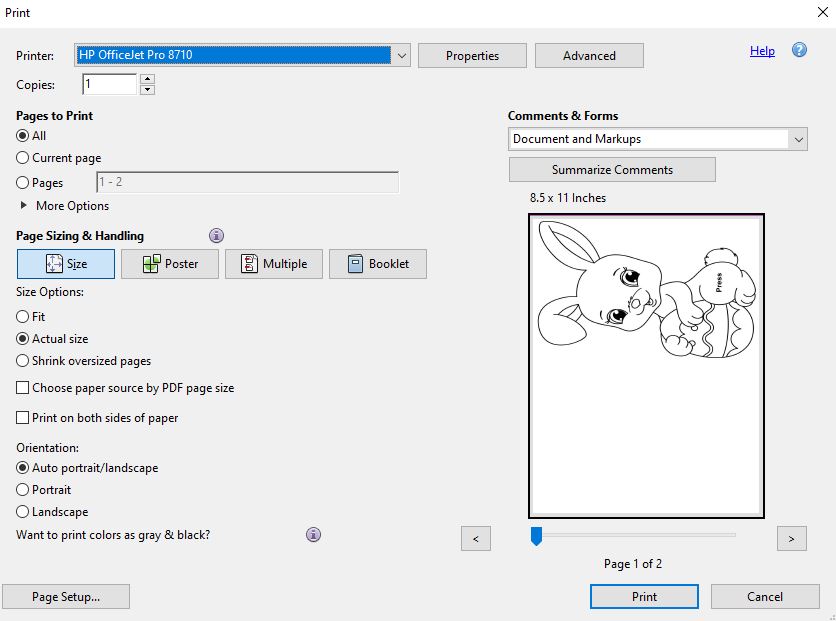
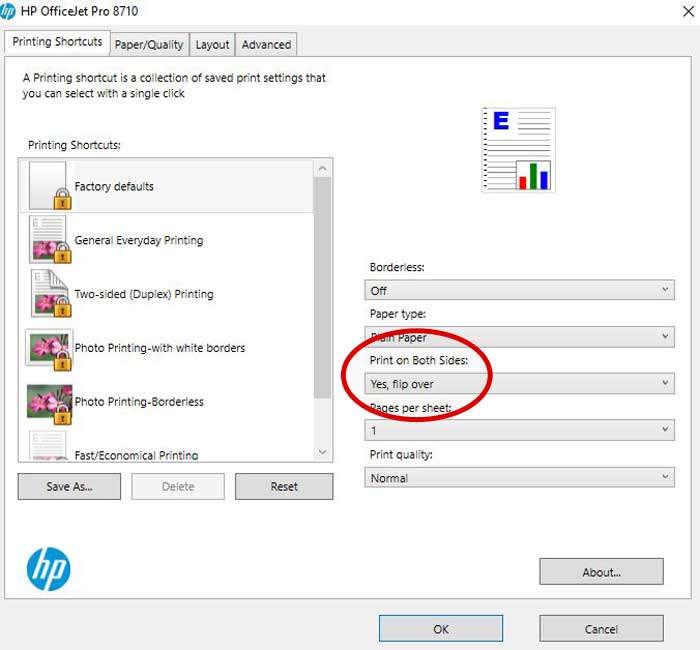
Open your PDF template and select the printer icon at the top of the page. This will open you print screen which is where you are able to select 2-sided printing. Click on the “Properties” and then select “Print on Both Sides”.
Step 2 – Color, Cut & Fold Template
Once you have printed your template, you can color and decorate the design.

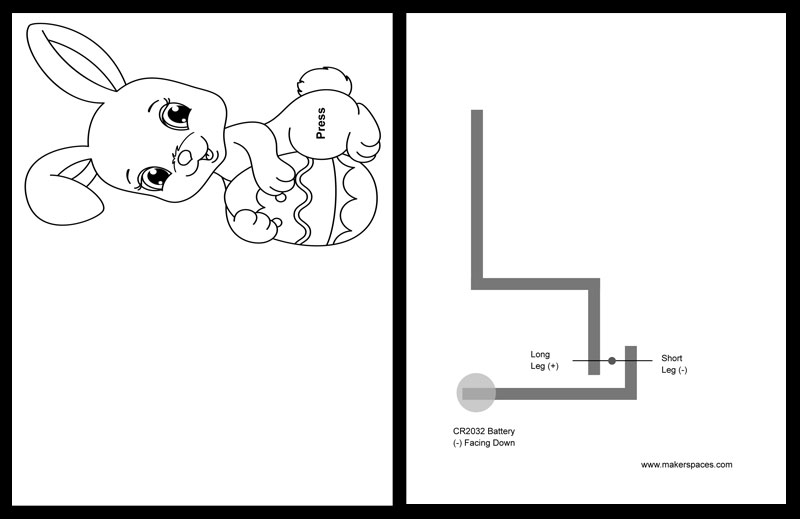
After you finish coloring the template, cut an “X” in the nose. This is where the LED needs to go through. The last part of this step is to fold the template in half.

Step 3 – Apply Copper Tape
Turn your template over so you can see the brown circuit lines on the back. Apply the copper tape to all of the circuits. We recommend you use copper tape that has conductive adhesive such as the kind we sell in our paper circuit kits.
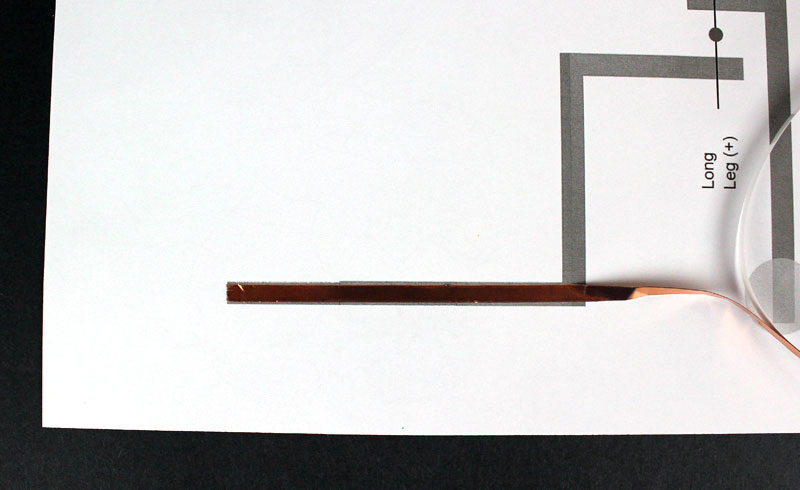
Begin by applying he copper tape in a straight line to the corner. Then fold the tape at a 45 degree angle in the opposite direction in which you are going.
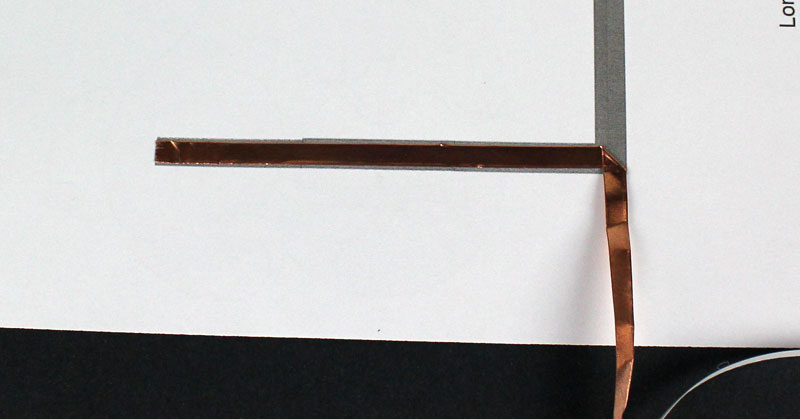
Next, fold the copper tape back along the line.
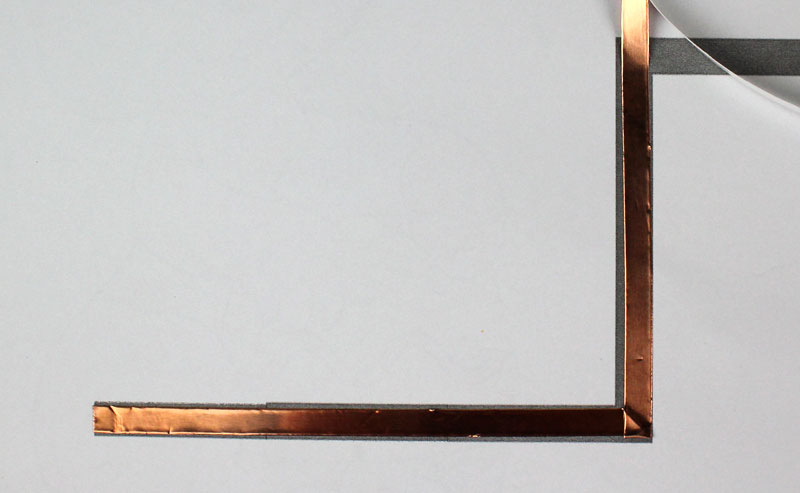
One you have applied the copper tape to all of the areas, smooth it down with your finger.

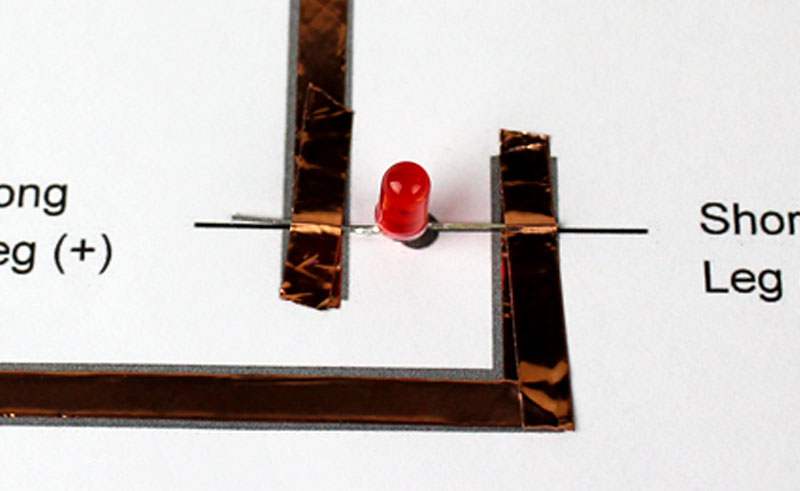
Step 4 – Attach The LED
The next step is to attach your LED to the template. Make sure to note which leg is longer because this is the positive (+) side of the LED. The shorter leg is the negative side.
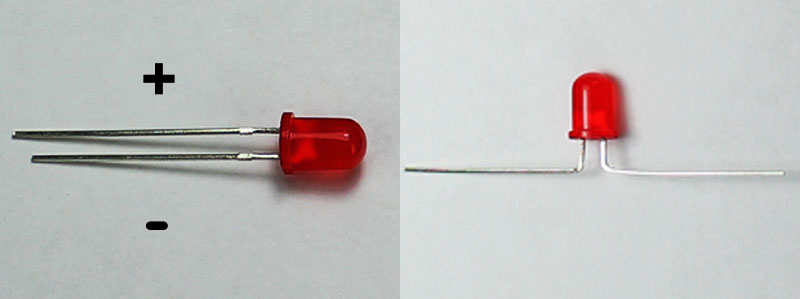
Bend both legs of the LED at a 90 degree angle and attach it to the circuit using copper tape. Make sure to attach the long leg to the side marked positive. Rub the copper tape to ensure everything is making solid contact.
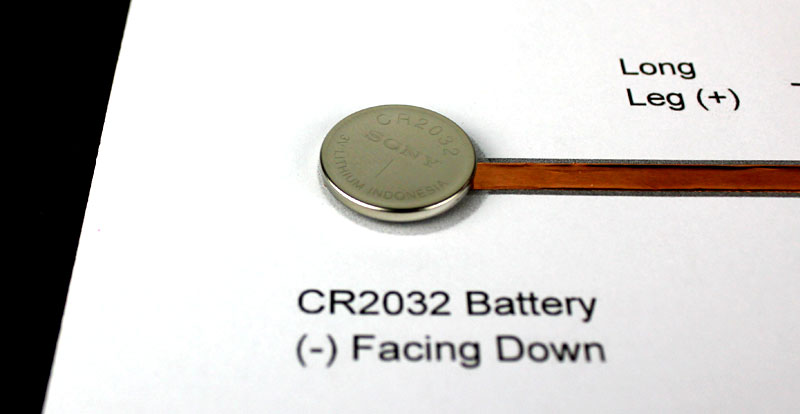
Step 5 – Attach The Battery
Now it’s time to mount the coin cell battery to the project template. Begin by cutting a small piece of copper tape and rolling it into a ball. Make sure the adhesive is facing out and stick it to the copper tape in the battery circle.
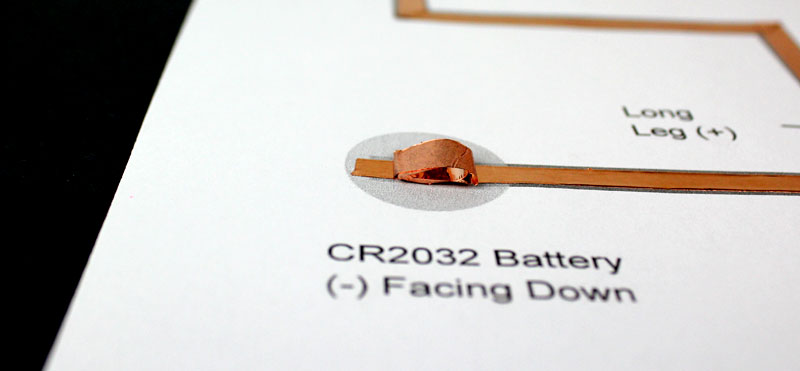
Place your CR2032 battery on top of the copper ball with the negative (-) side facing down.
Step 6 – Test The Circuit
At this point, your circuit is complete. Fold the card in half and push the LED through the cut you made earlier in the template. Push the area marked “Press” to test your paper circuit.

Show Us Your Project
Follow us on Twitter at @Makerspaces_com and tweet us if you made this or another project. We love seeing your makerspaces and the creations you’re making.
If you’re looking for more paper circuit projects, please check out our ebook which has 45 project templates along with our paper circuit starter kit.