
In this project tutorial, we’re going to be making 6 different Halloween paper circuit creations. Using parallel and simple circuits, you’ll be able to bring these templates to life with copper tape, LEDs and batteries.
Once you learn how to create these projects, you can use the concepts learned to make your own haunted paper circuit creations.
Project Time: 15 minutes (Each Project)

This project includes (6) full color templates and (6) black and white outline templates. See “Materials Needed” to download the templates.
The B&W outline templates can be colored with markers or crayons or printed on colored paper.

Materials Needed
- LED – 5mm (Any Color)
- Conductive Copper Tape
- CR2032 Coin Cell Batteries
- (6) Color Templates – FREE Download
- (6) BW Outline Templates – FREE Download
Need the materials for this project? We have a paper circuit starter kit & ebook available. The kit includes copper tape, LEDs and CR2032 batteries. Also included is a project ebook with 45 project templates.

Step 1 – Print Templates
The first thing you need to do is download the project templates and print them out.
Each character comes in full color or black and white outline.

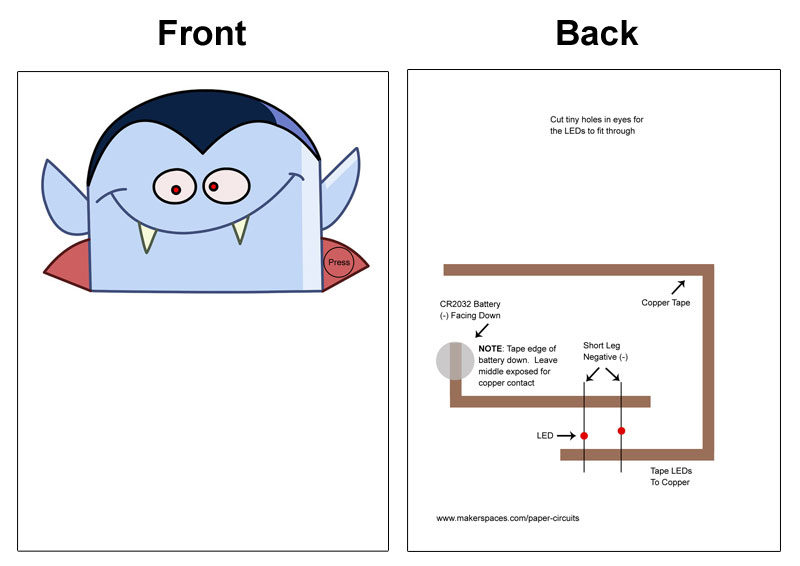
Each project is 2 pages and it’s recommended that you print them on one sheet of paper (front and back). Below is what the complete vampire template looks like.
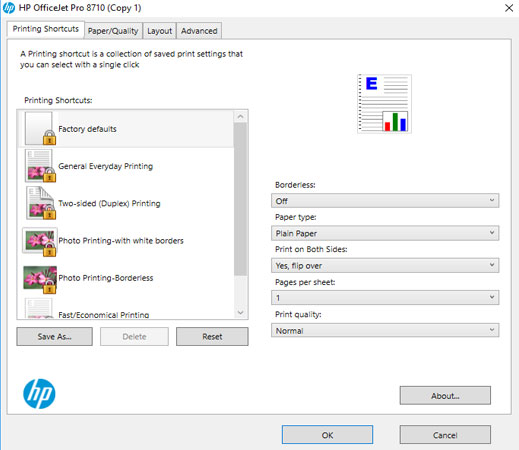
For two-sided printing, you will need to select this in your printer properties.
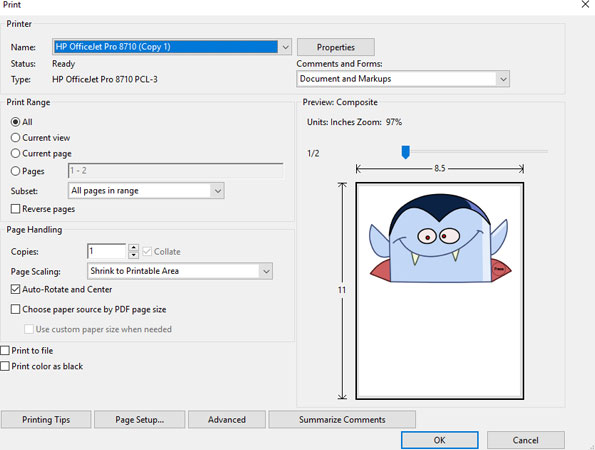
Once the properties box is open, you need to select the area for printing on both sides and then choose “flip over”.
NOTE: This project will still work if you print the templates out on two separate sheets of paper. It just has a cleaner look with one sheet.
Step 2 – Apply Copper Tape
Now it’s time to create the circuit that will power your project. Apply the copper tape to the brown circuit traces found on the template. It’s always best to try and use one single piece of copper versus a cutting it into a few smaller pieces.
To learn how to fold the copper at the corners versus cutting it, check out our post:

Step 3 – Fold Template
Once the copper tape has been applied, you will need to fold the template in half.

Step 4 – Add LEDs
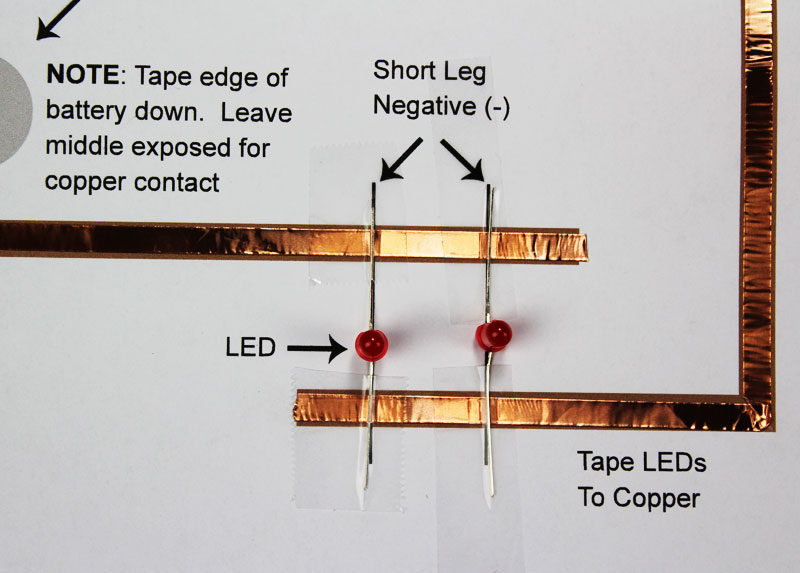
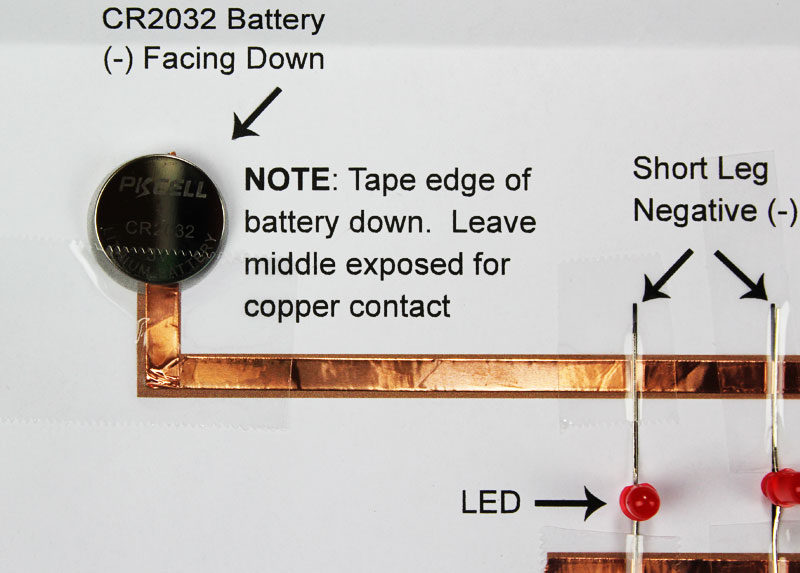
Now it’s time to add the LEDs to your paper circuit. You will need to bend the legs of the LED at a 90 degree angle. Make sure you remember which one is the SHORT leg. This is the negative leg and will go on the copper where (-) is noted.
Once the LEDs are bent, tape them securely to the copper. Make sure the legs are making a solid connection with the copper.
Step 5 – Add Battery
Take (1) CR2032 coin cell battery and place the negative (-) side facing down on the grey circle. Tape only the edge of the battery down to the paper. Make sure the middle of the battery is exposed so when the template is folded the copper tape can make contact to it.
Step 6 – Done !
Flip the template over and make small cuts in the red part of the vampire’s eyes. Push the LEDs gently through the holes and then push the “PRESS” button to see it come to life !
Need the materials for this project? We have a paper circuit starter kit & ebook available. The kit includes copper tape, LEDs and CR2032 batteries. Also included is a project ebook with 45 project templates.
Share Your Projects
Follow us on Twitter at @Makerspaces_com and tweet us what you’re working on. We love seeing your makerspaces and projects.
Keep Making !