
Learn how to create a light-up Father’s Day card using paper circuits. This project is a great way to be creative and make something special for your father.
Paper circuits use copper tape and a coin cell battery to illuminate an LED. In this project, we use the LED as a light-up “tie clip”. Great project for any makerspace.
Project Time: 20 Minutes
Materials Needed
To get started you will need the following items:
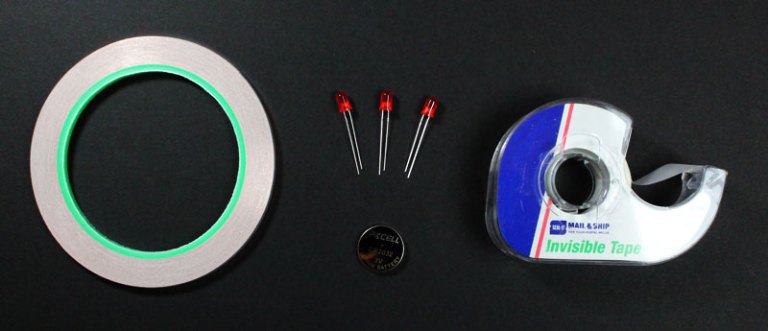
- Copper Tape
- Transparent Tape
- (1) LED
- (1) Coin Cell Battery
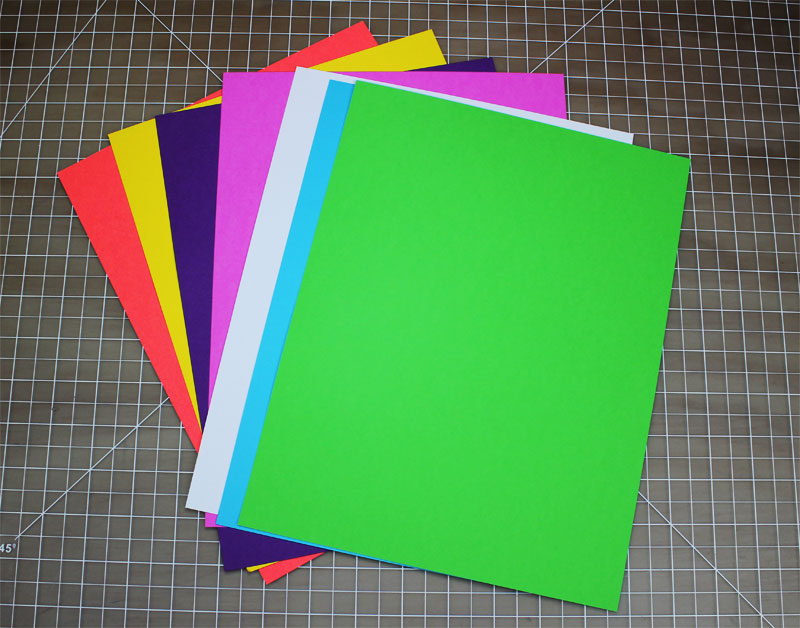
- Colored Paper
- Project Template (FREE PDF)
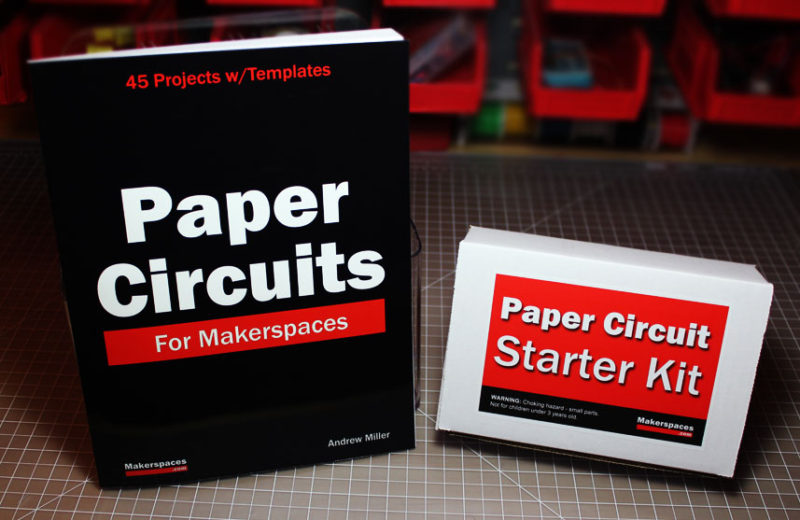
Need the materials for this project? We have a complete paper circuit starter kit & ebook available. This kit comes with the materials needed for 10 paper circuit projects. The ebook has 45 additional projects w/ printable templates.
Paper circuit classroom packs are also available.
Step 1 – Select Your Shirt & Tie
For this project, you will be using colored cardstock, scrapbook or wrapping paper to create a shirt and tie. You can mix and match a wide variety of paper to get the desired look for your card.
Here are some examples of scrap book paper that we will be using for the tie. You can also use plain white paper decorated with stickers and markers.
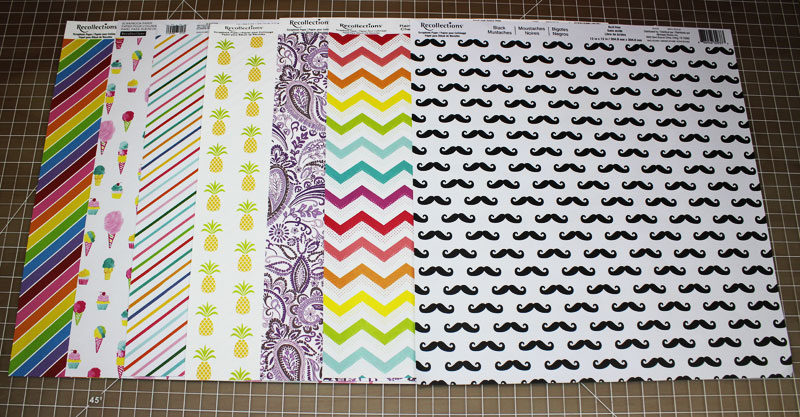
Using wrapping paper for the tie is also a really affordable option. This is great for a class or workshop setting.

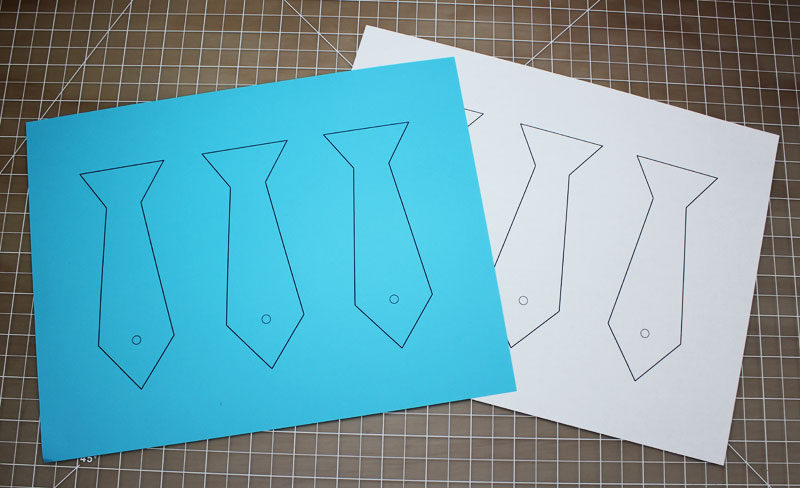
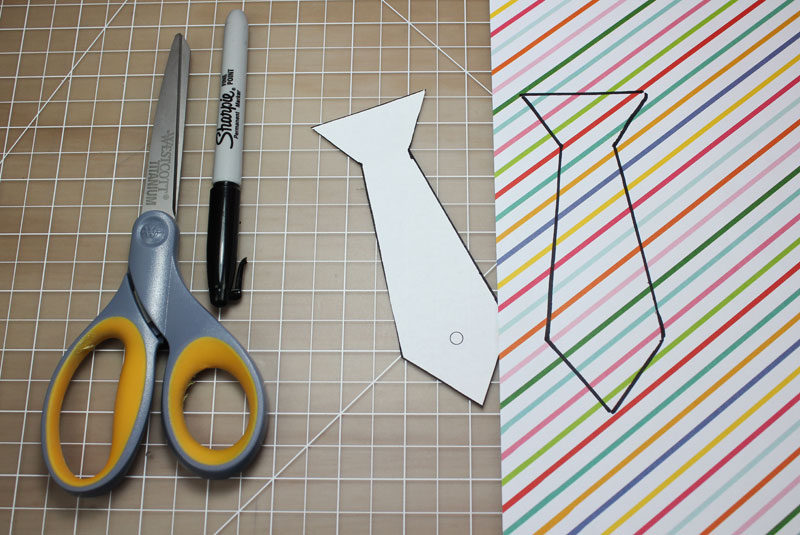
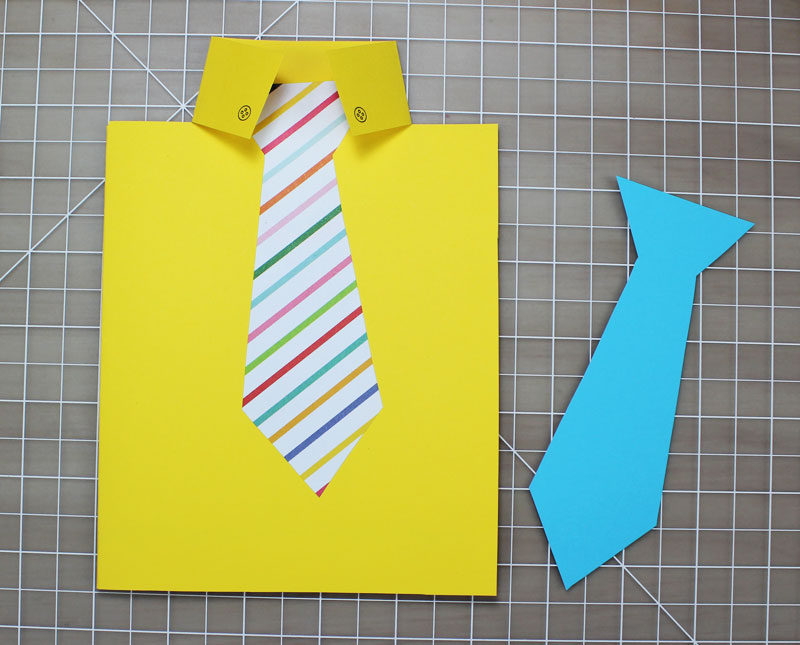
Step 2 – Create The Tie
To begin, make sure to download the FREE project template.
The tie can be created in three different ways. One way is to print the tie on colored cardstock as shown below in blue. You can also print it on plain white paper and use stickers and markers to create a custom designed tie.
The third way is to cut out the tie and use it as a template on top of wrapping or scrapbook paper for a more elaborate design.
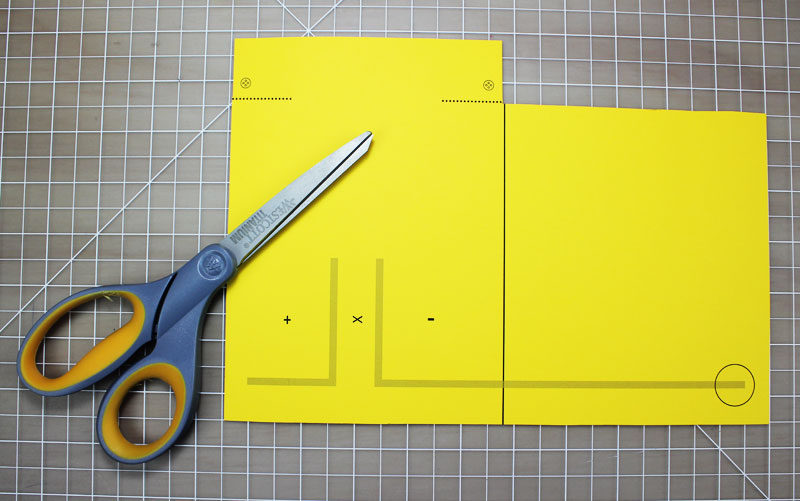
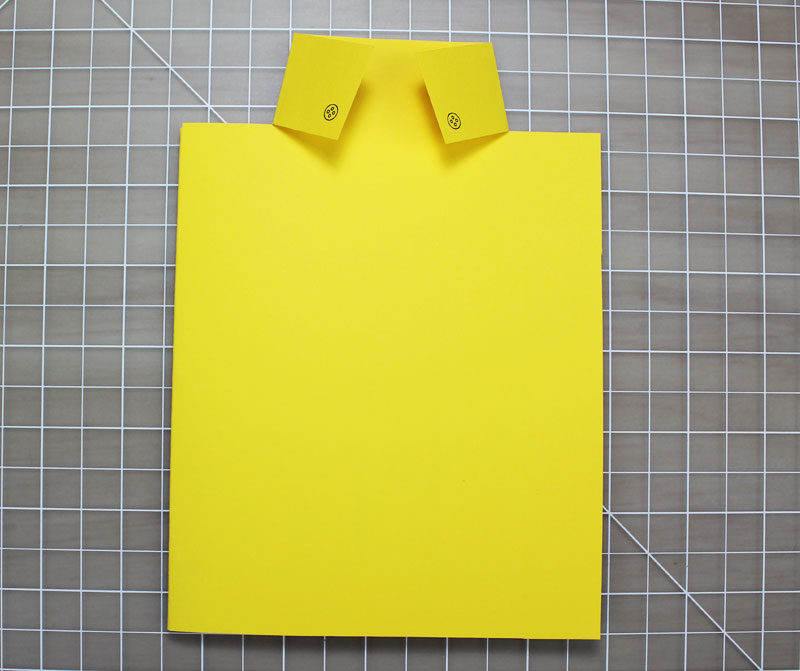
Step 3 – Create The Shirt
The next step is to create the dress shirt that will be the body of this card.
Select a color cardstock that compliments your tie and print the template on that paper. Once it’s printed, cut the dotted lines around the card.
Now you need to fold the card in half and then fold the collar as shown in the below photo. Make sure the top corners of the collar touch each other just like a real shirt would do.
Step 4 – Attach The Tie
Now attach your tie to the shirt by using a glue stick or double-sided tape. The blue tie below is just shown as an alternative option.
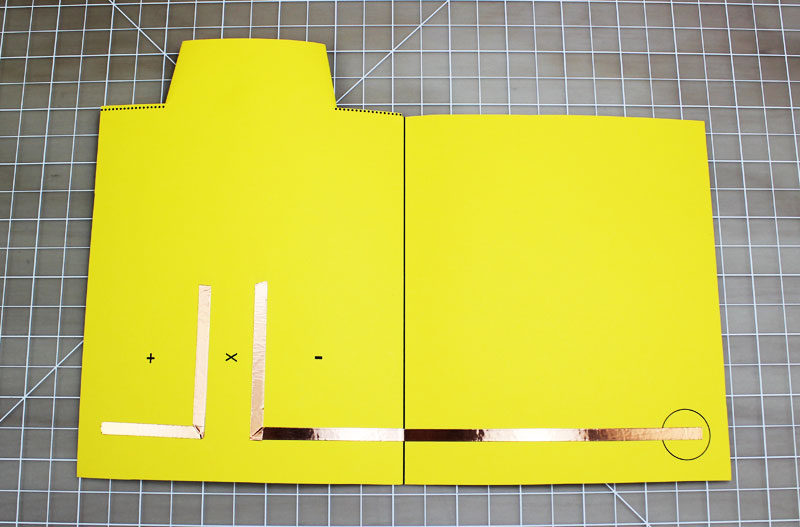
Step 5 – Create The Circuit
It’s time to add the circuit to the card that will help light up the tie clip on the front.
Apply your copper tape to the grey circuit lines on the card. Do your best to fold the copper at the corners versus cutting it into two pieces. Having a single piece of copper will increase conductivity and ensure the LED lights properly. Learn more by reading our paper circuits tutorial for beginners.
Step 6 – Add The LED
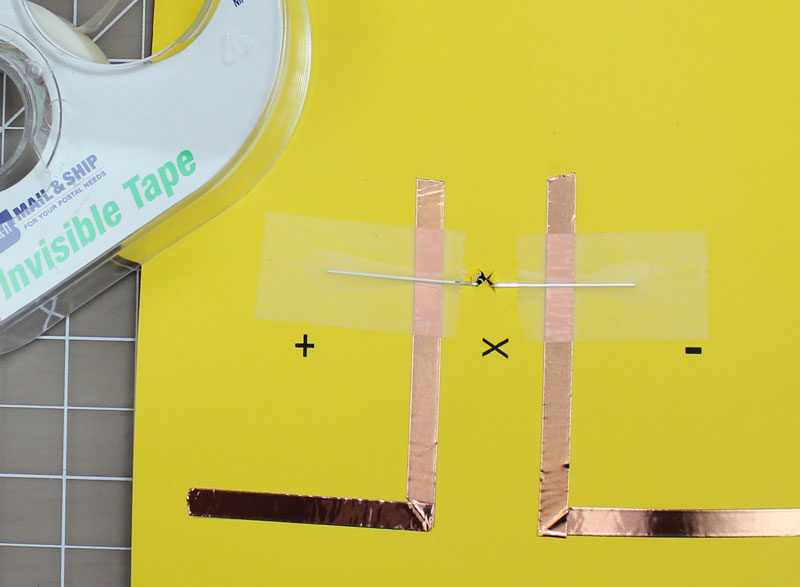
Begin by flipping over the template so the tie is visible. Using a razor or scissors, create a small “X” through the tie and shirt where a tie clip would normally be.
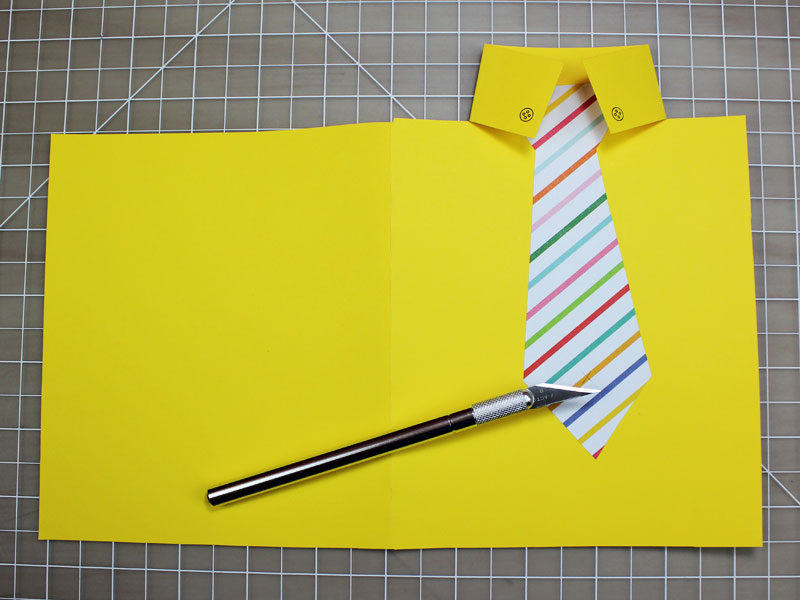
Take your LED and push the legs through the “X” on the template.

Flip the template over and bend the legs at a 90 degree angle so they contact the copper tape. Tape the legs firmly in place.
NOTE – Make sure the LONG leg (+) goes on the left side marked (+) and the SHORT leg goes to the negative side.
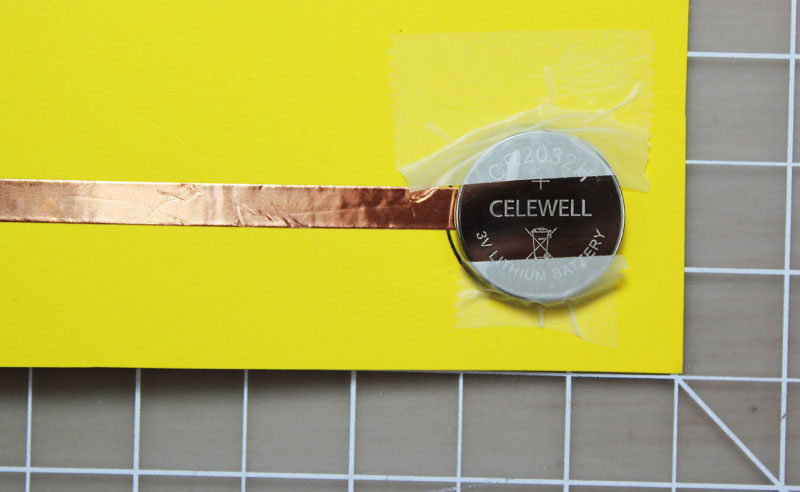
Step 7 – Attach the Battery
Place your coin cell battery (3V) on top of the copper tape with the negative (-) facing down. Tape the very edges of the battery leaving the middle exposed. When the card is folded, the copper tape will touch the top of the battery acting as a switch.
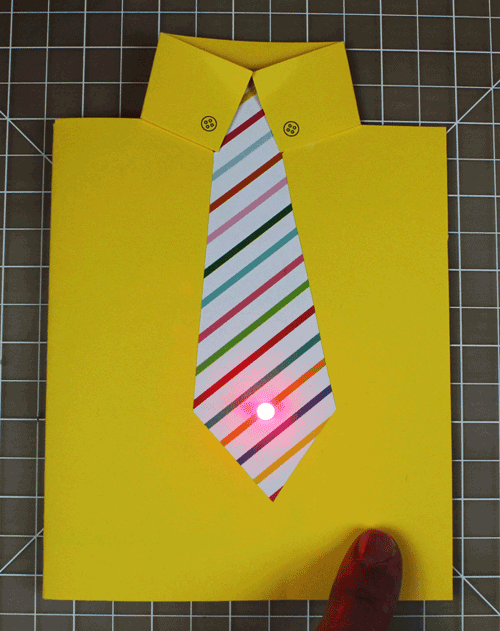
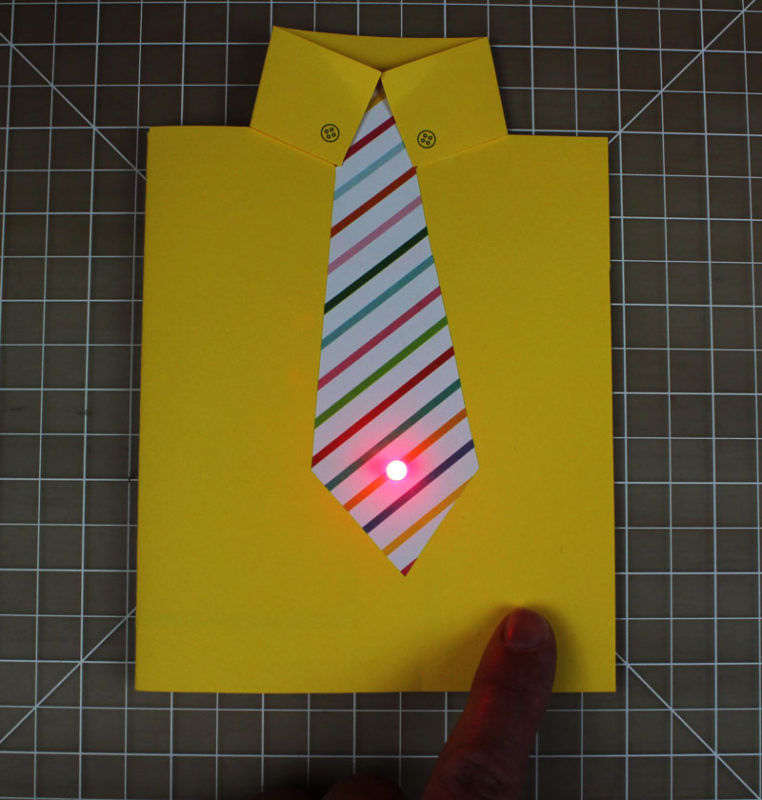
Fold the card and press the corner to make sure the LED lights up.
Step 8 – Final Touches
If you want, you can add a special message to the inside of your card.
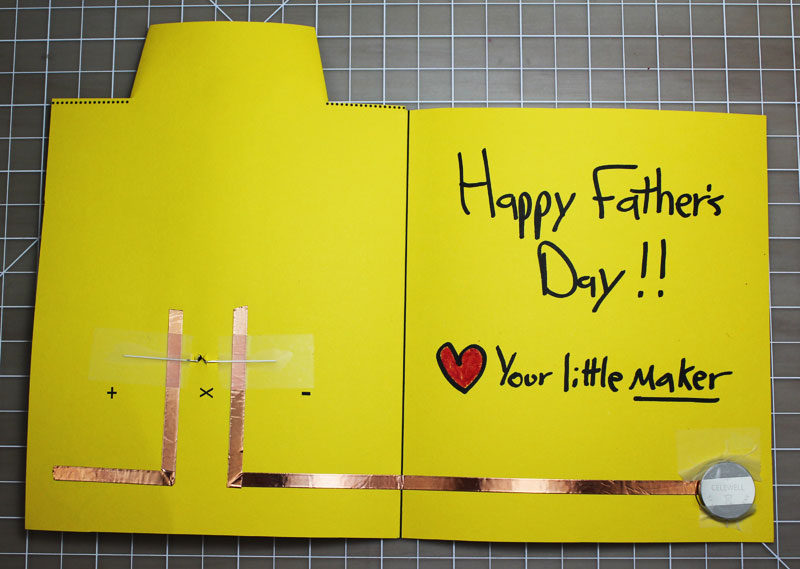
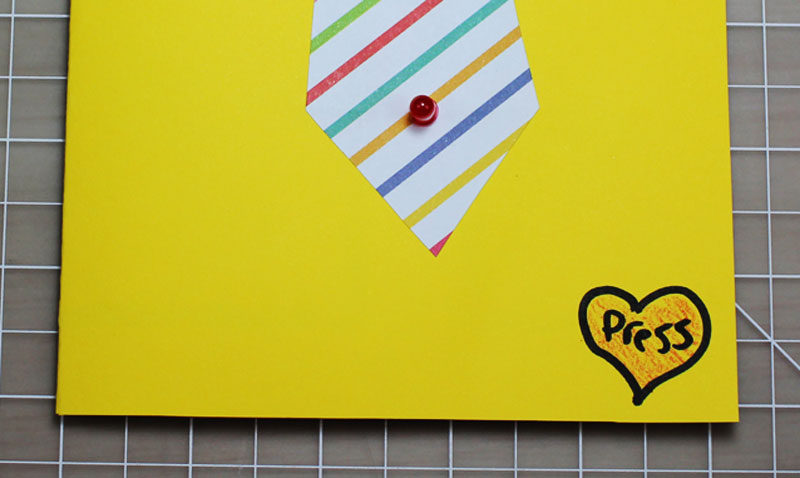
It’s also highly recommended that you add the word “PRESS” or some other message to the bottom right corner of the front.
Project Complete !
We hope you liked this project and would love to see a photo of your Father’s Day card. Tweet us @Makerspaces_com
Paper Circuit Kit Book
Need the materials for this project? We have a complete paper circuit starter kit & ebook available. This kit comes with the materials needed for 10 paper circuit projects. The ebook has 45 additional projects w/ printable templates.
Paper circuit classroom packs are also available.