
In this project tutorial, we’re going to make light-up Christmas cards using copper tape, LEDs and a coin cell battery. This is a really fun STEM or makerspace project that you can do around the holidays.
Learn the basics of electricity and circuits while making custom holiday cards for your friends and family.
Project Time: 15 minutes (Each Project)


Materials Needed
- LED – 5mm (Any Color)
- Conductive Copper Tape
- CR2032 Coin Cell Batteries
We sell a complete paper circuit starter kit that contains the parts needed for 10 projects or students. Use the button below to buy the kit or project book.

Step 1 – Print Templates
The first thing you need to do is download the project template ZIP file and then print them out. Each project is 2 pages and it’s recommended that you print them on one sheet of paper (front and back).
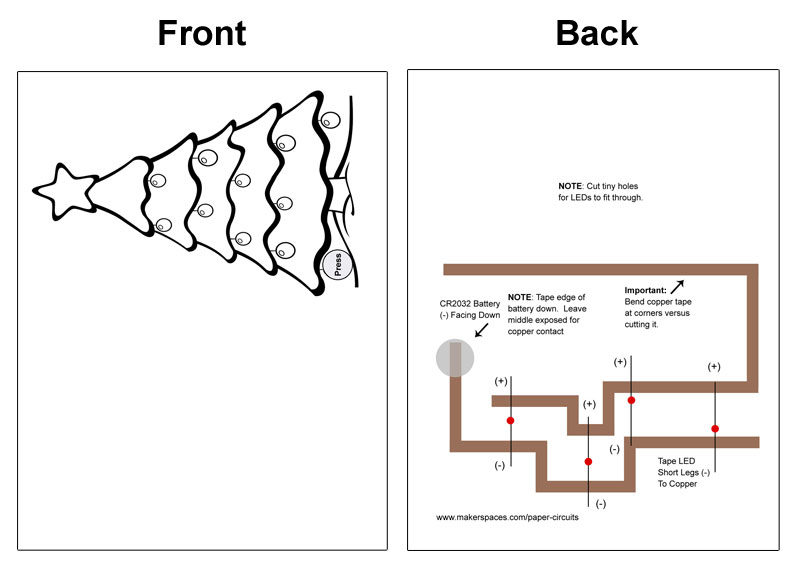
We’ve included a full color template and a black and white outline template so you can color it in yourself. The B&W option is great for STEAM projects or just to save printer ink.
Full Color Version
Black & White Version
 For two-sided printing, check your printer properties or setting.

On our printer it gives us an option to print on both sides of the paper. To do this, select “Printing on both sides” and then choose “flip over”.
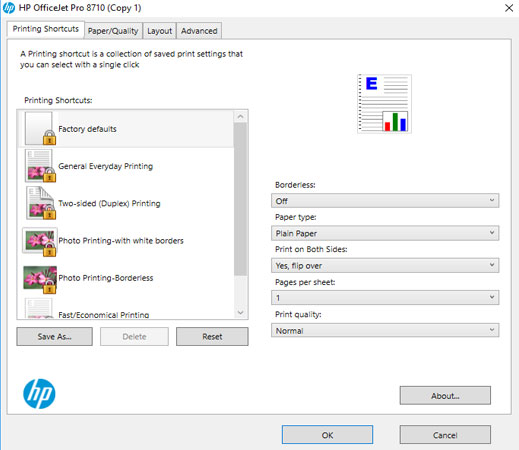
NOTE: This project will still work even if your printer doesn’t allow for two-sided printing. You will need to print the templates out on two separate sheets of paper.
Step 2 – Apply Copper Tape
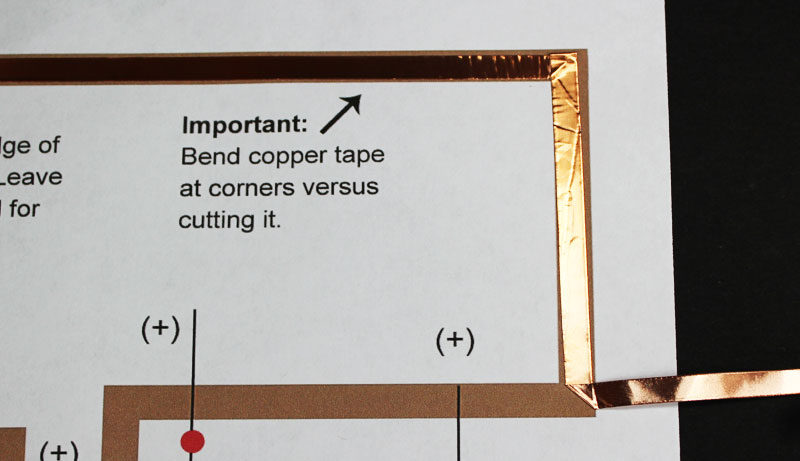
Now it’s time to make the circuit that will light your Christmas tree. You will need to apply the copper tape to the brown lines that are found on the template. Try to use a single piece of copper tape versus cutting it into smaller sections. The reason for this is because the conductivity is better when there are no breaks.
To learn how to fold the copper at the corners versus cutting it, check out our post: Paper Circuits For Beginners

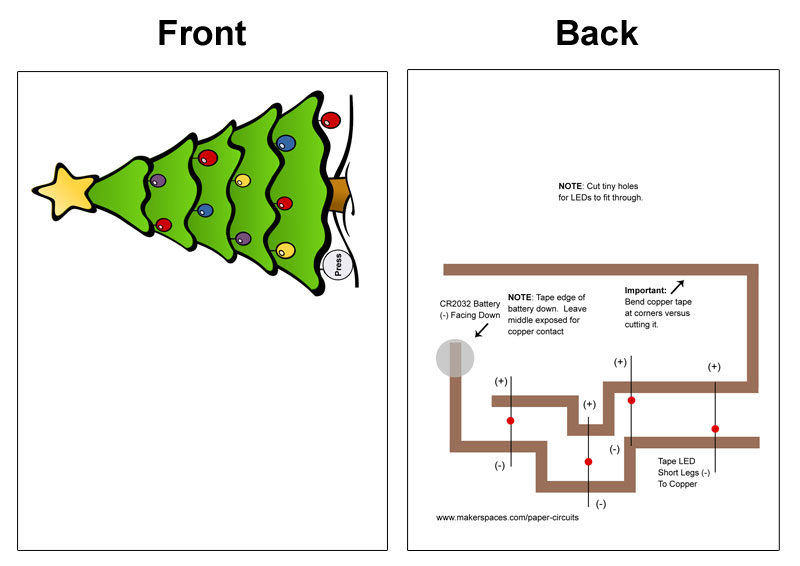
Step 3 – Cut Holes In Tree
Flip over the template and cut an “X” in the 3 red ornaments on the tree. Also, cut an “X” at the bottom of the yellow star. These cuts will allow the LEDs to fit through the ornaments so they are visible.

Step 4 – Add LEDs
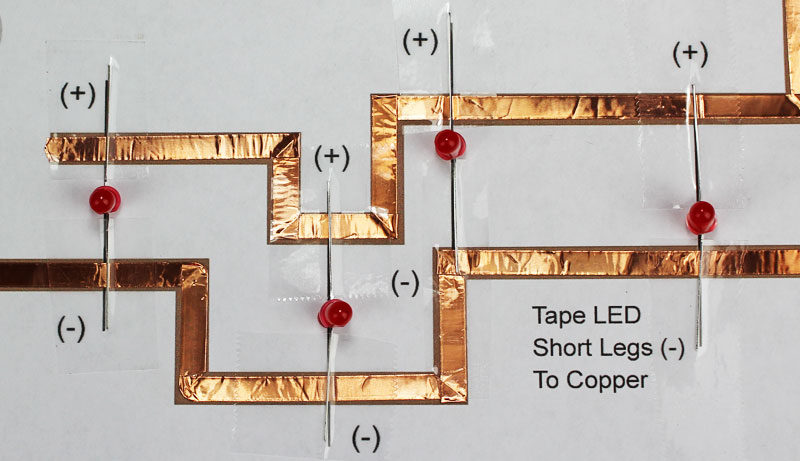
Now it’s time to attach the LEDs to the top of the copper tape. The long leg of the LED is the positive (+) side and the short leg is the negative (-) side.
Bend the long leg (+) at a 90 degree angle and then do the same with the short leg. Make sure to remember which leg is which because once they are bent they look the same.
Tape the long leg to the side marked with a (+) and tape it down. Do the same with the short leg as well. Make sure there is a solid connection with the copper tape.
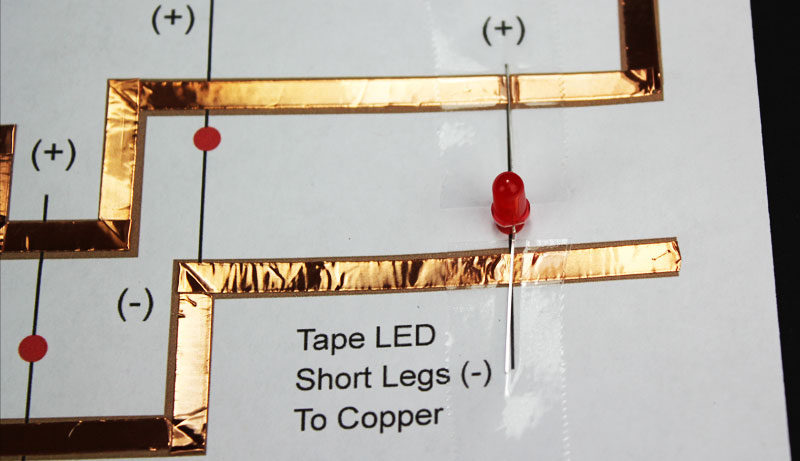
Attach the (4) LEDs to the spots marked on the template. Feel free to use any color LED as they all work the same.
Step 5 – Add Battery
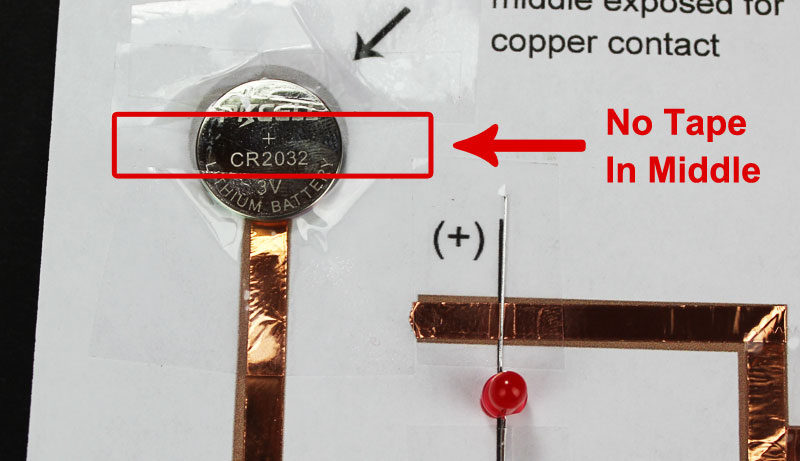
Place the negative side (-) of a CR2032 coin cell battery facing down on the grey circle. Tape the edges of the battery down to the paper. Ensure there is no tape down the middle of the battery. The middle is where the copper needs to touch when the template is folded.
Step 6 – Done !
Fold the template in half and push the LEDs through the holes you cut. Once you press the bottom left ornament, you should see your tree light up. Congrats !

Reindeer Template
Print out the reindeer template and put it together just as you did with the Christmas tree.

Share Your Projects
Follow us on Twitter at @Makerspaces_com and tweet us when you make this project.