Project Time: 15-30 minutes
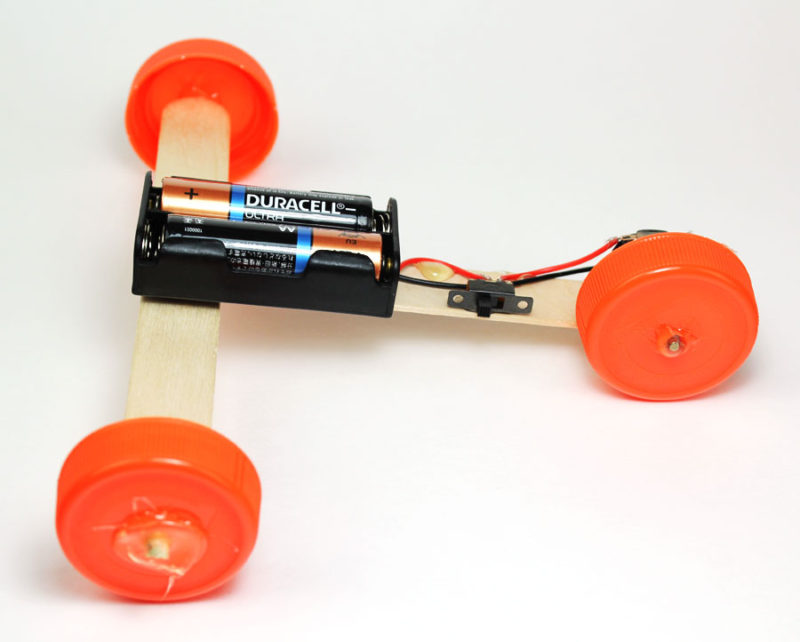
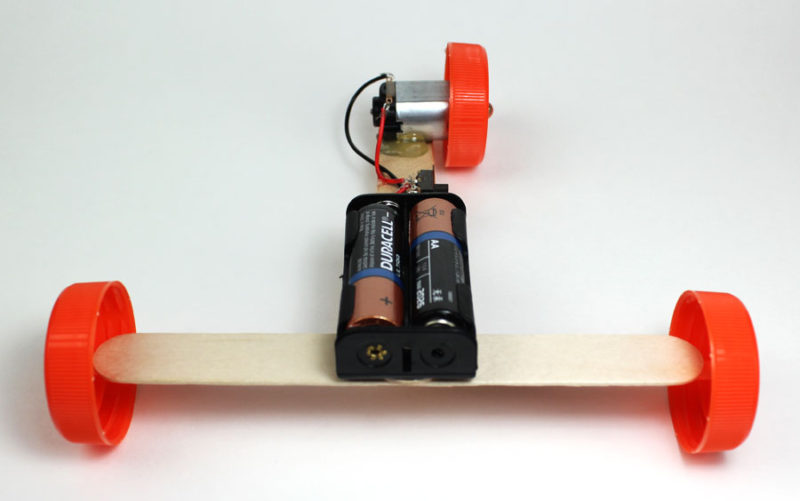
Create this super simple STEM car using popsicle sticks and a DC motor.
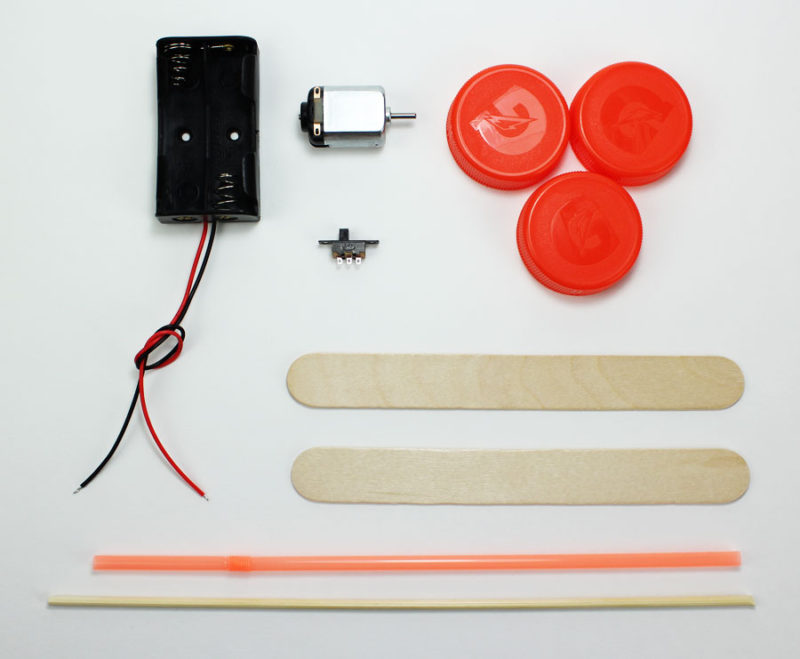
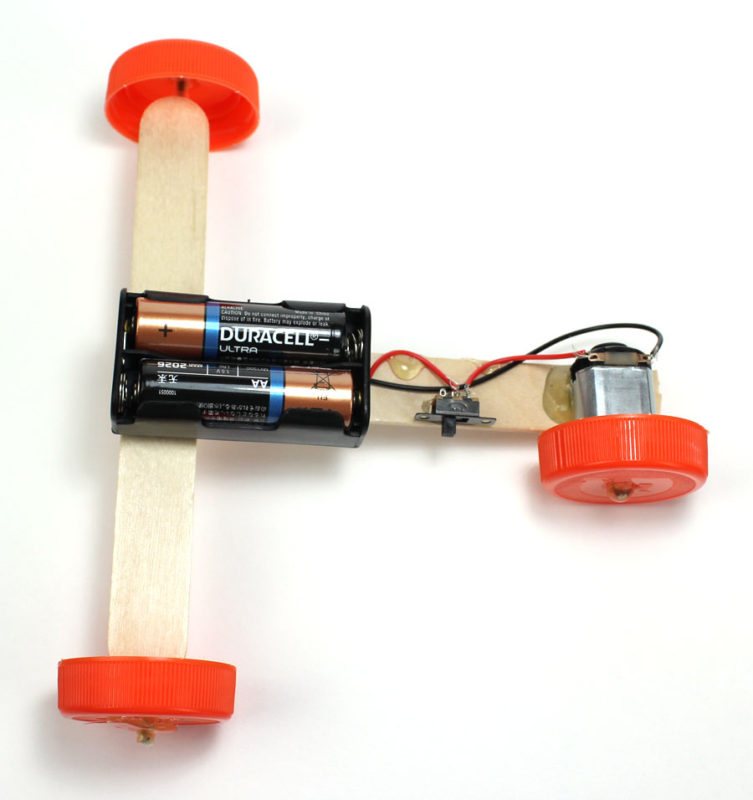
Materials Needed
For this project you will need the following items:
- AA Battery Holder
- DC Motor
- Switch
- Craft Sticks
- Bottle Caps
- Straw
- Wood Skewer / Dowel Rods
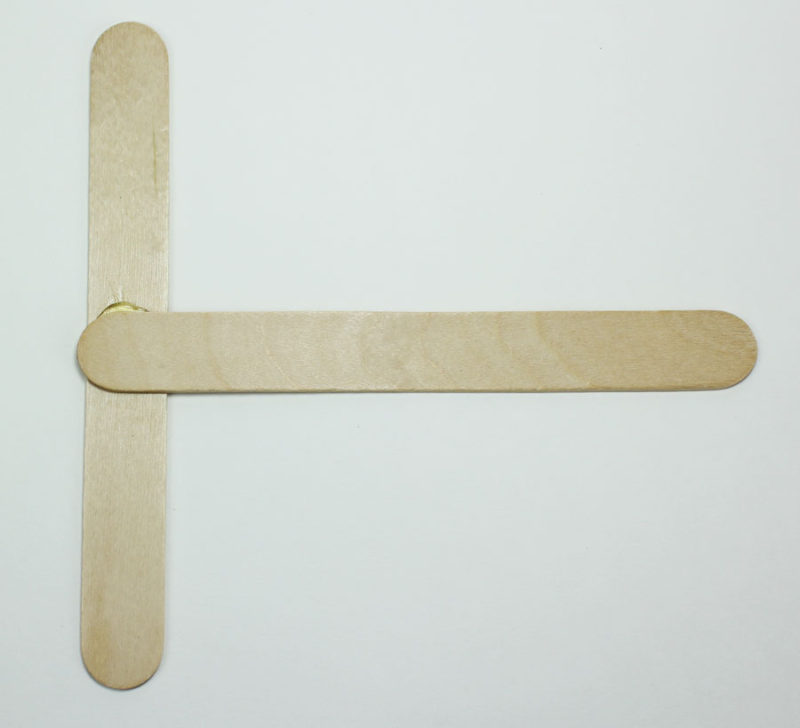
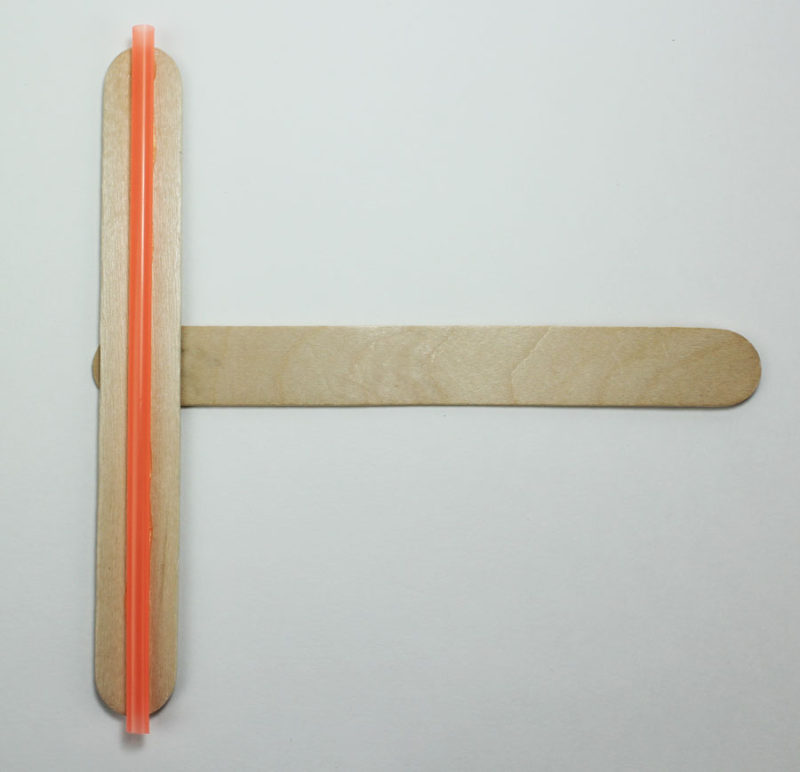
Step 1 – Build The Body
Using hot glue, attach one craft stick perpendicular to the other craft stick.
Step 2 – Attach The Straw
The straw will be used to hold your axle. Glue the straw to the end piece and trim the ends.
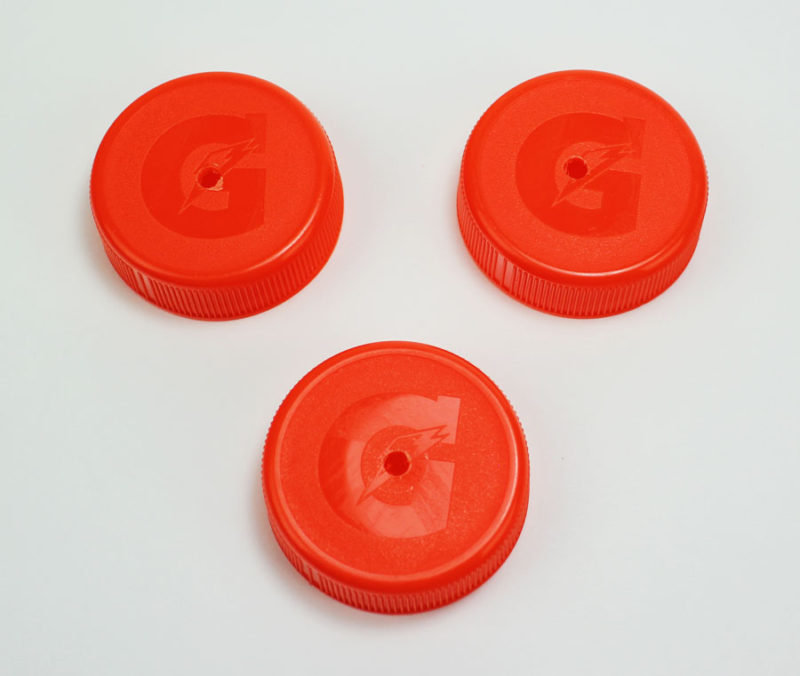
Step 3 – Prep The Wheels
Find the center of the 3 bottle caps and drill a hole the same diameter of your wooden skewer.
Step 4 – Attach The Wheels
Slide the skewer into the straw leaving about an inch sticking out on both ends. Mount the bottle caps to the axle using hot glue to secure. Make sure to hold the wheels vertical and straight while the hot glue cools down.
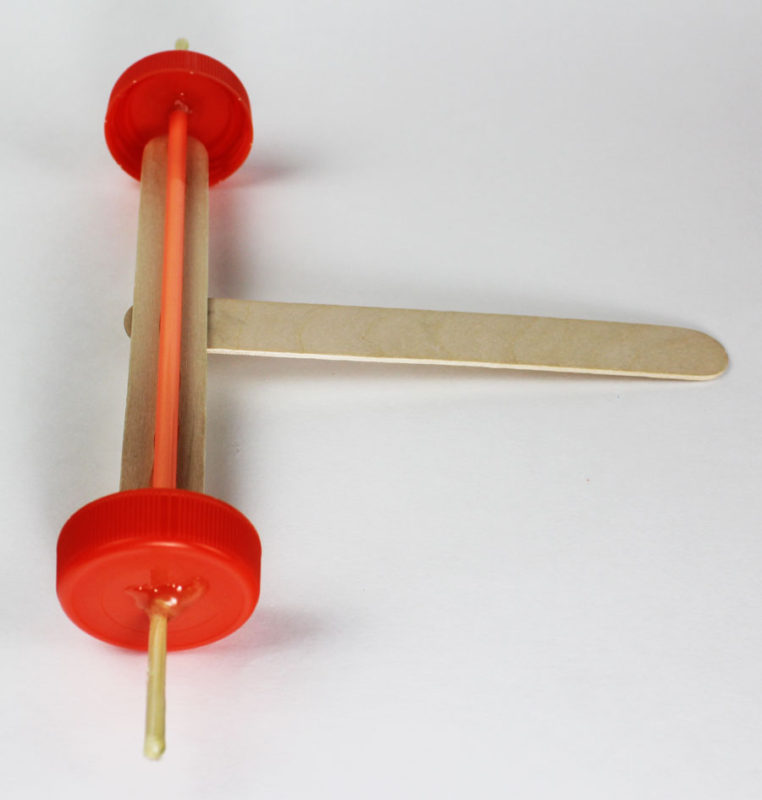
Once the wheels have been mounted, you can trim the excess of the wooden axle.

Step 5 – Battery Holder
Glue the battery holder to the middle of the car.
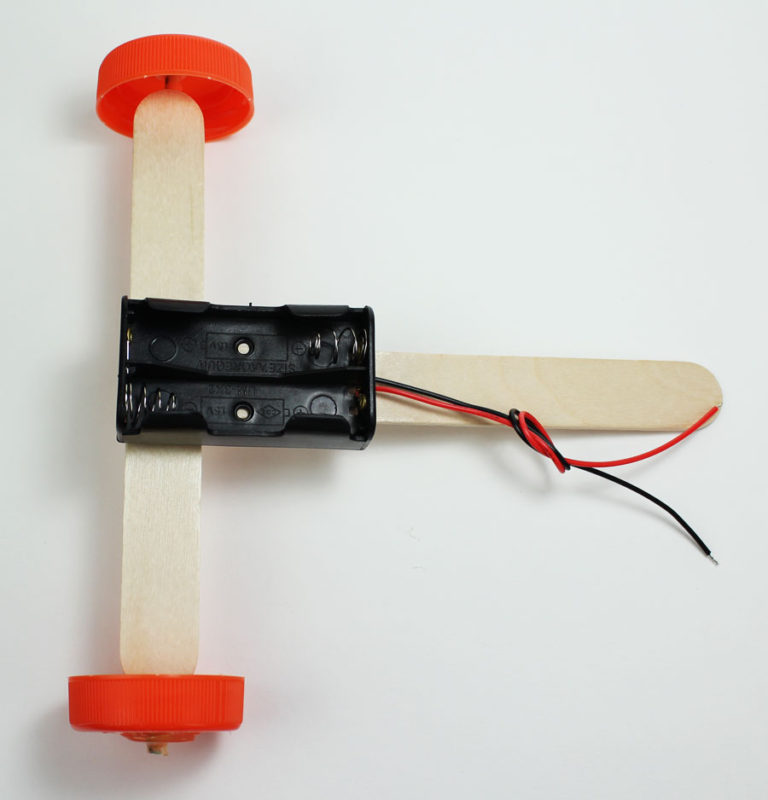
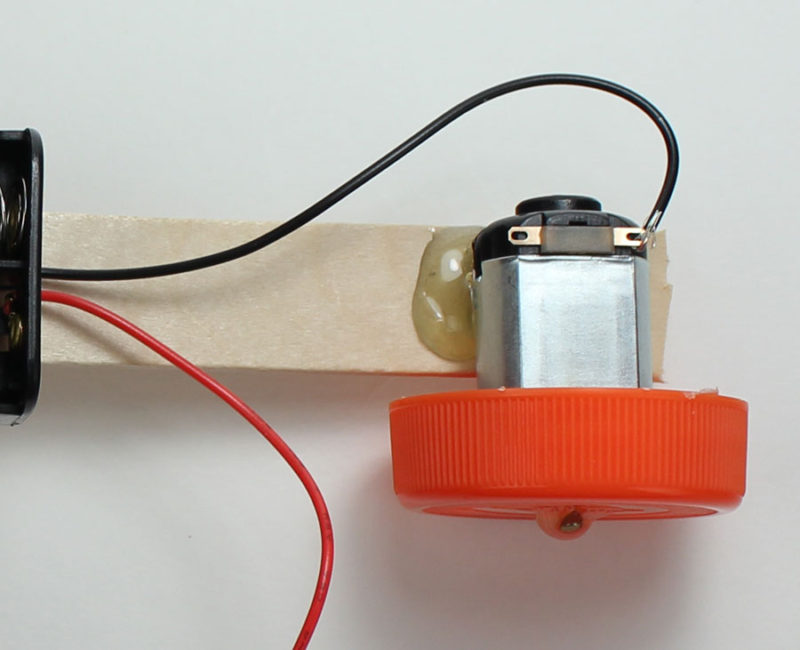
Step 6 – Attach The Motor
Glue the middle of the motor to the end of the craft stick. Make sure the terminals of the motor are on top and visible.
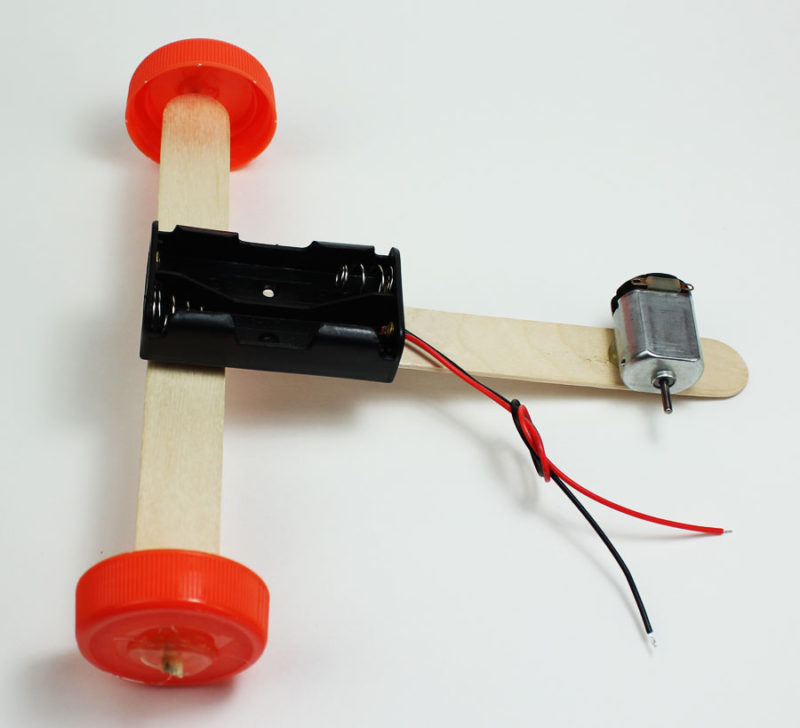
Step 7 – Attach Front Wheel
Attach the final bottle cap to the motor shaft using hot glue. Make sure to hold the wheel straight and vertical while the glue cools.
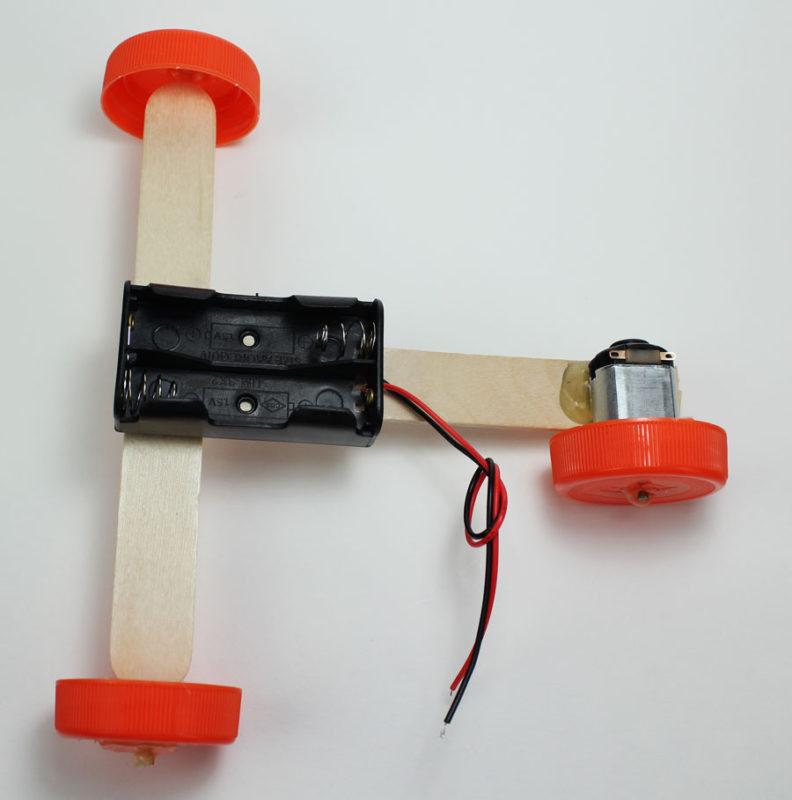
Step 8 – Wire The Motor
Attach the black wire from the battery holder to one of the terminals on the motor. Twist the wire in place to secure it.
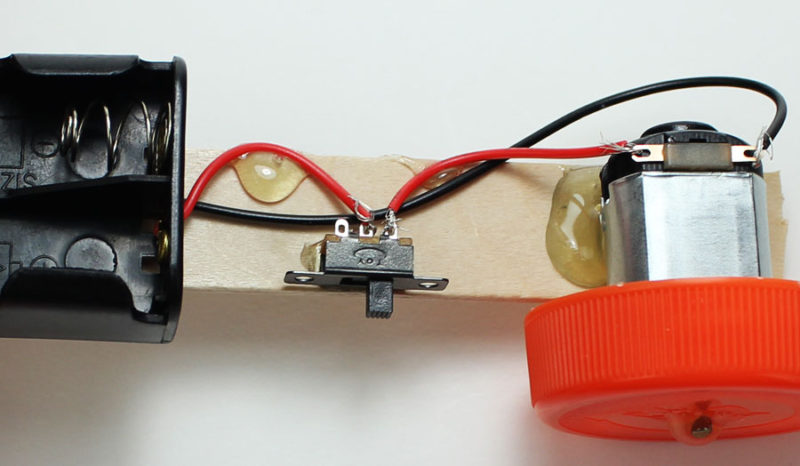
Step 9 – Connect The Switch
Attach the red wire from the battery holder to the remaining motor terminal and twist to secure it. Cut the red wire in half and then strip both ends. Connect the red wire from the battery holder to the middle hole in the switch. Attach the red wire from the motor to the terminal on the end of the switch.
Glue the switch to the craft stick.
Complete
Add 2 AA batteries to the battery holder and flip the switch to test out your car.
Show us your project
Tweet us at @Makerspaces_com and show us how your car turned out.