Squishy circuits are a fun way to learn and explore the basics of electricity and electrical circuits.
By using conductive and insulating dough, you can create sculptures with embedded lights, motors and buzzers. This project is great for younger students because it utilizes a material they already know…PlayDoh.
The concept of squishy circuits was developed by Dr. AnnMarie Thomas while at the University of St. Thomas.
Materials Needed
In order to create squishy circuits, you will need the following:
- (1) Battery holder – 4XAA Batteries w/ Switch
- (4) AA Batteries
- LED – 5mm or 10mm Jumbo
- Conductive Dough (Recipe Below)
- Insulating Dough (Recipe Below)
Make Conductive Dough
The first step in this project is to create the electrically conductive dough. This material has a high salt and water concentration which allows it to conduct an electrical current.
Ingredients
- 1 Cup (237 mL) Flour
- 1 Cup (237 mL) Water
- 1/4 Cup (59 mL) Salt
- 9 Tbsp (133 mL) Lemon Juice
- 1 Tbsp (15 mL) Vegetable Oil
- Food Coloring

Step 1:
Mix 1 cup water, 1 cup of flour, 1/4 cup of salt, 9 Tbsp of lemon juice, 1 Tbsp of vegetable oil and food coloring in a medium sized non-stick saucepan.
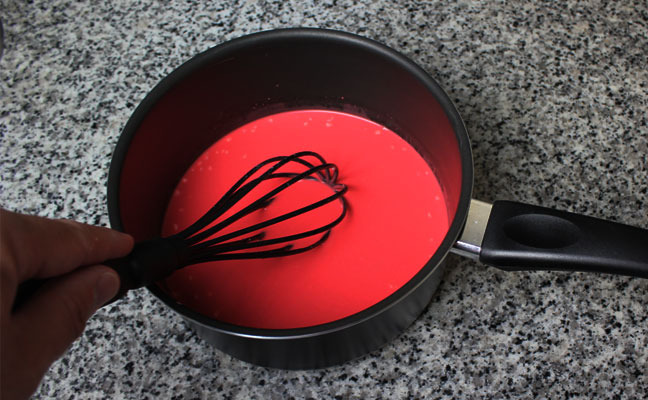
Step 2:
Place saucepan over medium heat and stir continuously until the mixture thickens.
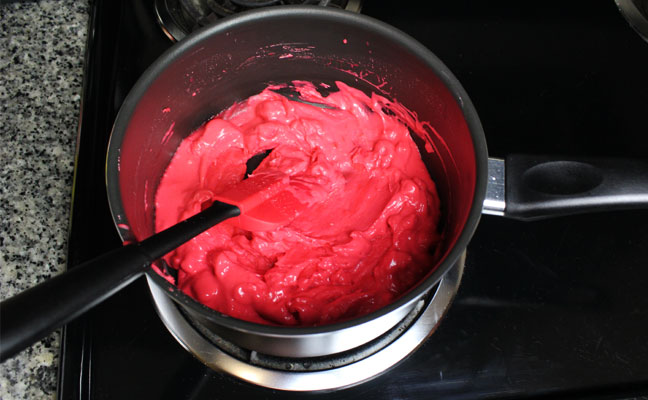
Step 3:
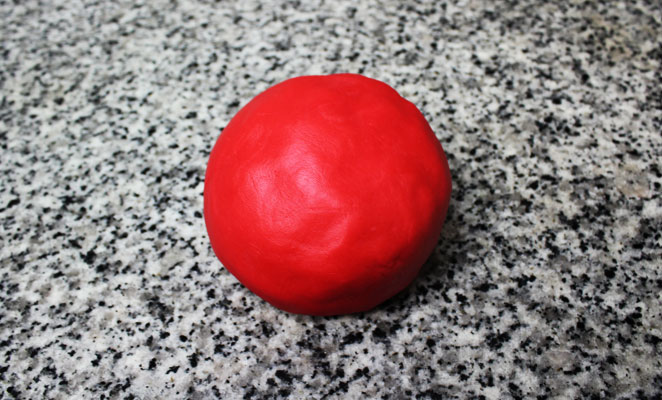
Continue stirring over heat until the mixture forms a ball.
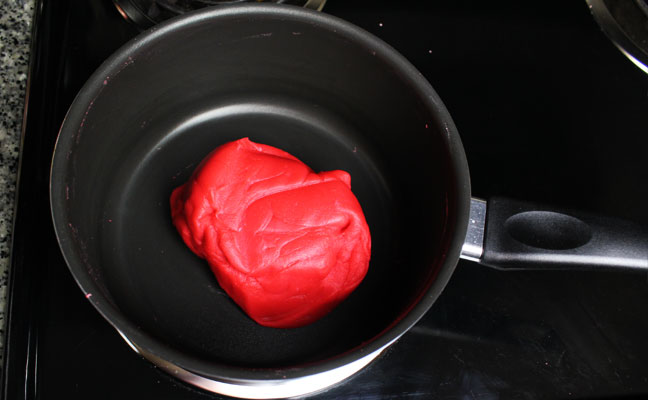
Step 4:
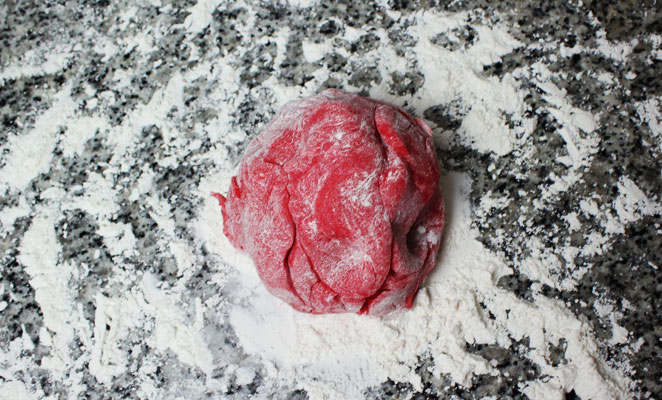
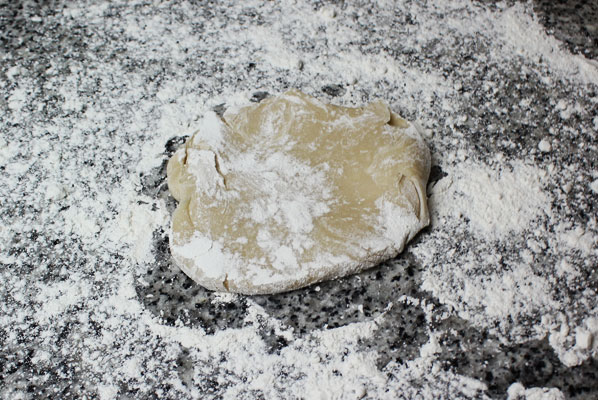
Place the ball on a lightly floured cookie sheet or counter top.
CAUTION– The ball will be warm for a few minutes. It’s recommended that you flatten the ball and let it cool before proceeding.
Step 5:
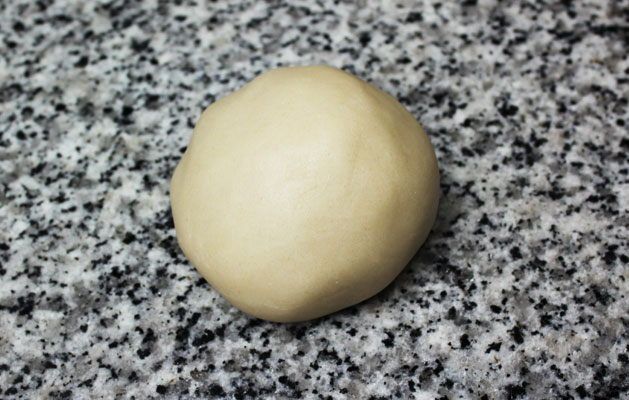
Slowly knead 1/2 cup of flour into the ball or until it is no longer sticky to the touch.
Optional
Instead of creating conductive dough from scratch, you can also buy commercially sold Play-Doh which has similar conductive properties.

Make Insulating Dough
Now it’s time to create the non-conductive or insulating dough for your squishy circuits. This dough will help resist electricity from flowing through it.
Ingredients
- 1 Cup (237 mL) Flour
- 1/2 Cup (118 mL) Sugar
- 3 Tbsp (44 mL) Vegetable Oil
- 1/2 Cup (118 mL) Purified Water (Deionized)
- Food coloring (optional)

Step 1:
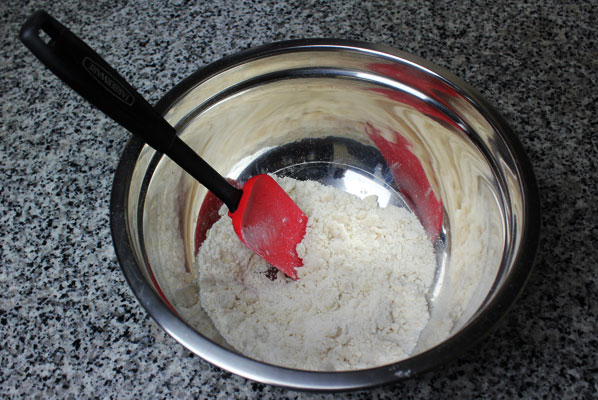
Mix 1 cup of flour, 1/2 cup of sugar, 3 Tbsp of vegetable oil in a mixing bowl. Stir until all oil is absorbed.
Step 2:
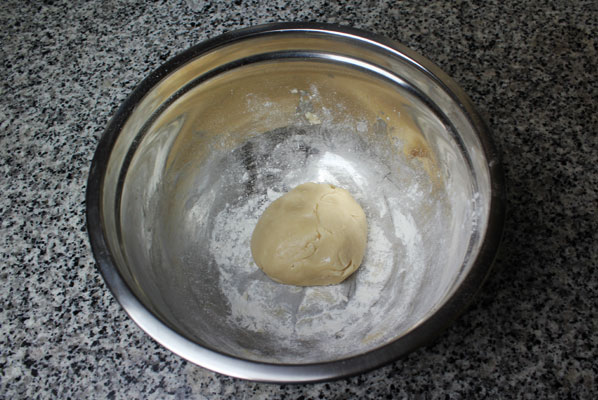
Pour small amounts of the purified water into the mixture and stir until water is absorbed. Repeat this until ball forms.
Step 3:
Place the ball on a lightly floured cookie sheet or counter top. Knead small amounts of flour into the ball until it is no longer sticky.
Optional
If you are not able to create insulating dough from scratch, you can buy modeling clay from most craft stores.

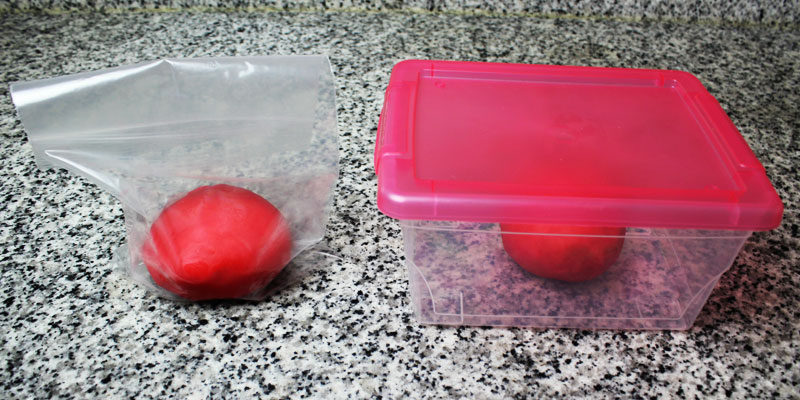
Storage
You can keep both the conductive and insulating dough in a sealed container or bag for up to a week. If the oil separates while in storage, add flour to remove the stickiness.
Make a Squishy Circuit
Now it’s time to put your conductive and insulating dough together to form a squishy circuit.
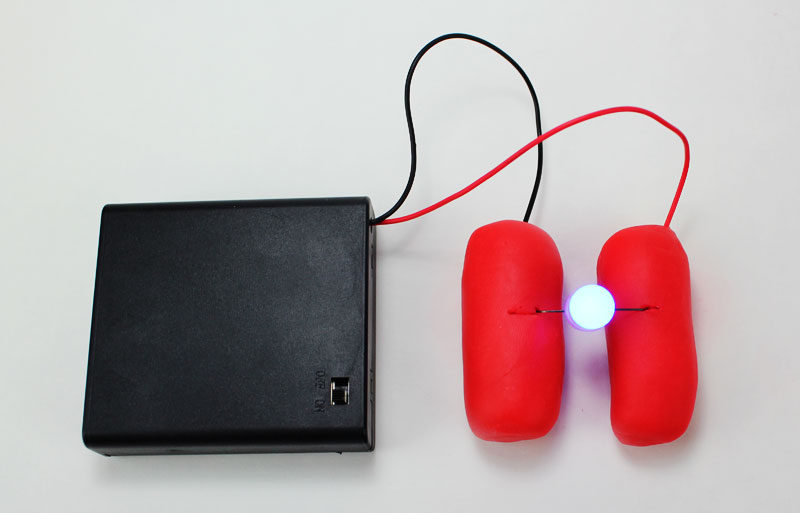
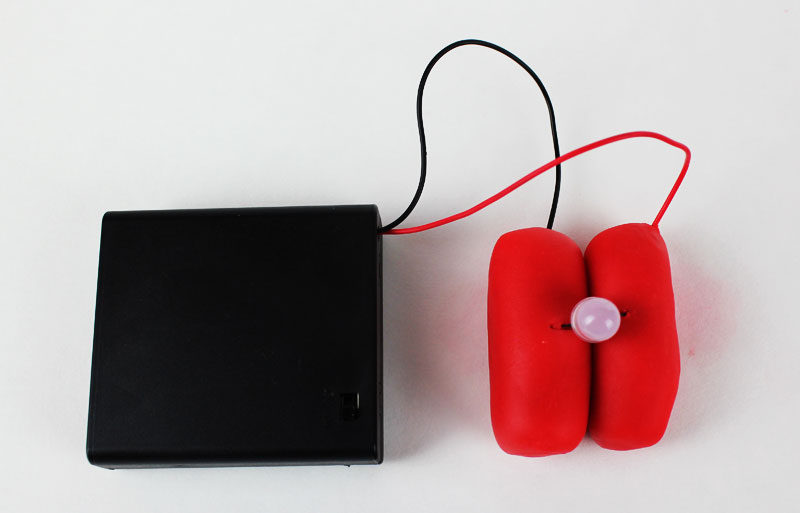
Step 1:
Take some conductive dough and form it into 2 separate rolls. Connect the red (+) wire from the battery to one roll and the black (-) wire to the other.
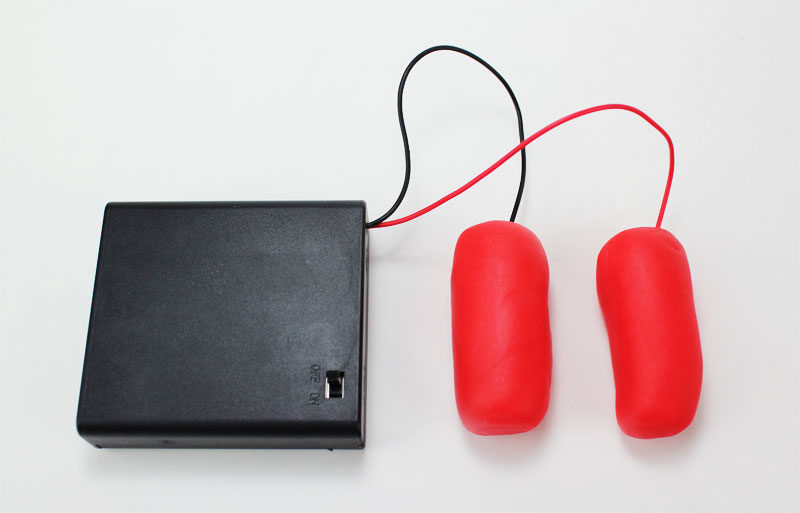
Step 2:
Take (1) LED and insert the long leg (+) into the roll that is connected to the red wire. Insert the other LED leg into the opposite roll and then turn on your battery pack. At this point, you have created a circuit and the LED should light.
Step 3:
Now we’re going to create a short circuit by pushing the dough together. Electrical current flows in a circle and takes the path of least resistance. It’s easier for the electricity to flow through the dough versus the LED. When the two rolls are pushed together, the current bypasses the LED creating a short circuit.
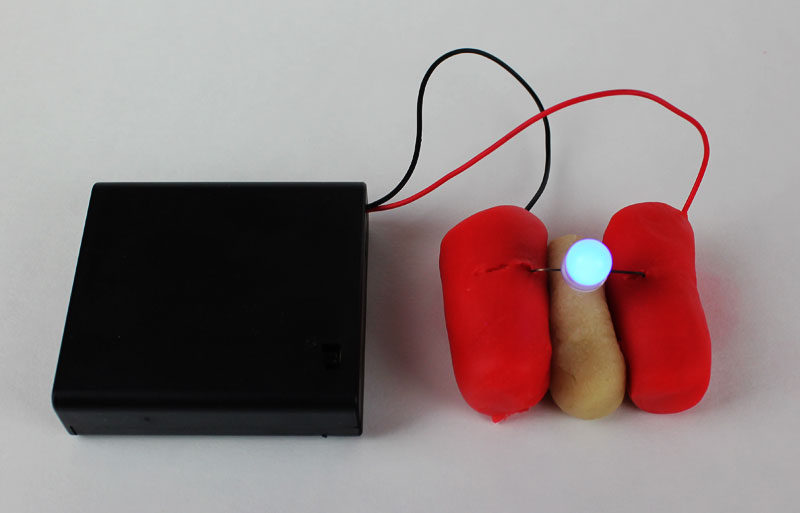
Step 4:
In order to prevent short circuits as outlined above, we need an insulator between the conductive dough. Take some of your insulating dough and place it between the two pieces of conductive dough.
CAUTION – If your battery pack has a switch, make sure to turn it off when you are done with your experiments.
Add Motors, Buzzers and More
In addition to lighting an LED, you could power a DC motor or a buzzer in the same way. The below projects are from squishycircuits.com and they show what can be created with conductive and insulating dough.

Testing out my @SquishyCircuits before my #makerspace demo tomorrow! pic.twitter.com/FaYGRaWi1r
— Spartanforlife (@Spartanforlife) October 12, 2017