Arduino is one of the most popular prototyping boards on the market and it’s being used in makerspaces all around the world. In our past tutorial, Arduino Uno for Beginners, we discussed the basics of this board along with some simple Arduino projects you could create. Now we’re going to show you an alternative way to get started with Arduino by using the LittleBits Arduino Coding Kit.
Intro To littleBits
For those of you not familiar, littleBits is a collection of electronic modules known as bits that connect together using magnets. Each bit has a specific function such as an input or an output like an LED or a motor. Snap them together and you can create circuits in seconds with no programming required.
But what if you wanted to create and code your own inventions without having to use the traditional Arduino, breadboard and jumper wire setup? That’s where the Arduino Coding Kit comes in and is a perfect fit. This kit includes an Arduino bit and other accessories that will allow you to code your own interactive hardware projects.
littleBits Arduino Coding Kit
The following are the bits and accessories that are included in the littleBits Arduino Coding Kit. For the following two projects, you will only need a few of them and they could be purchased seperately if needed.

Arduino Bit Breakdown
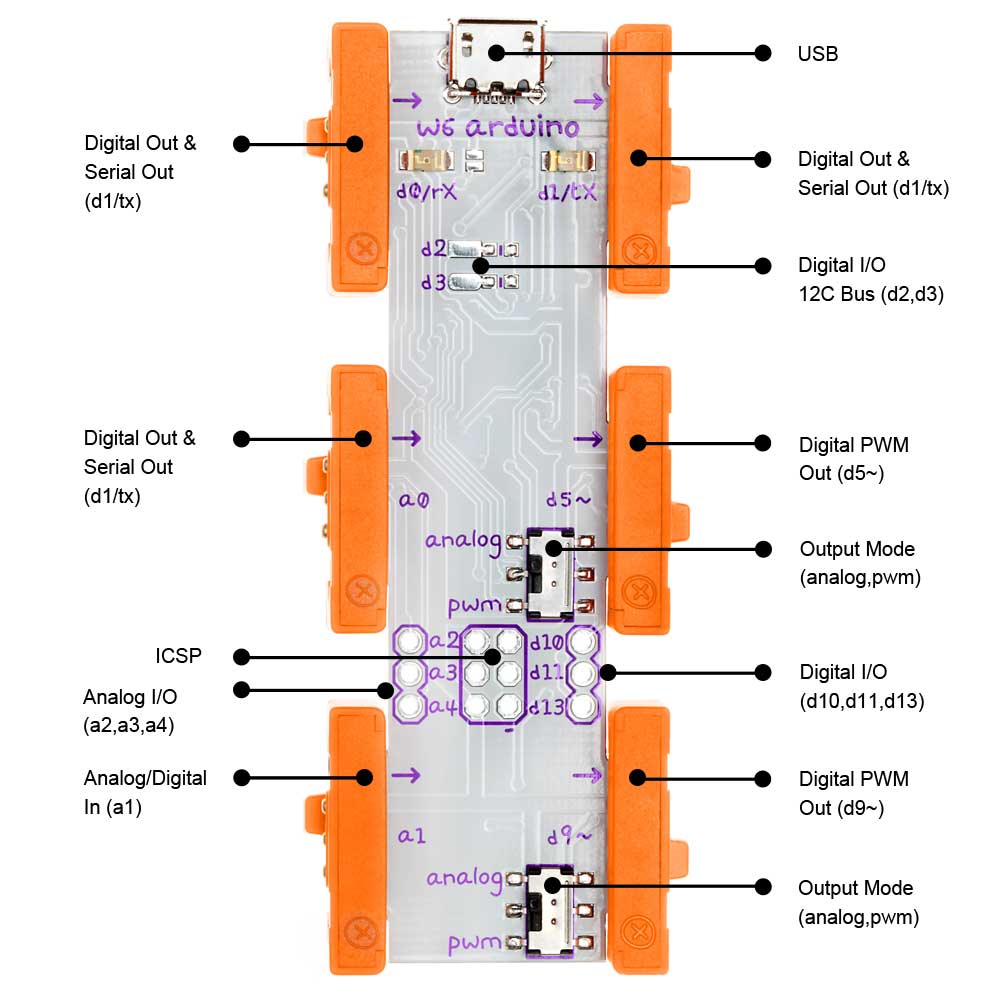
The “brains” of the Coding Kit is the Arduino bit and the below graphic helps to point out it’s key components. If you want more information on this bit, check out this Arduino bit tutorial from littleBits.
Project 1- Blink an LED
Now it’s time to learn by doing! In this section, we’re going to set up the bits and software that’s needed for your first project.
Parts Required
- Arduino Bit
- Power Bit
- Battery & Power Cable
- Micro USB Cable
- Bright LED Bit
- Optional – Arduino Coding Kit
Step 1 – Create LED Blink Circuit
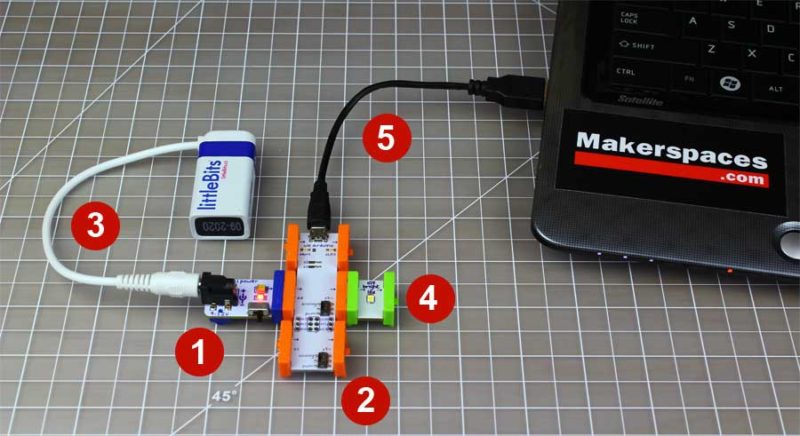
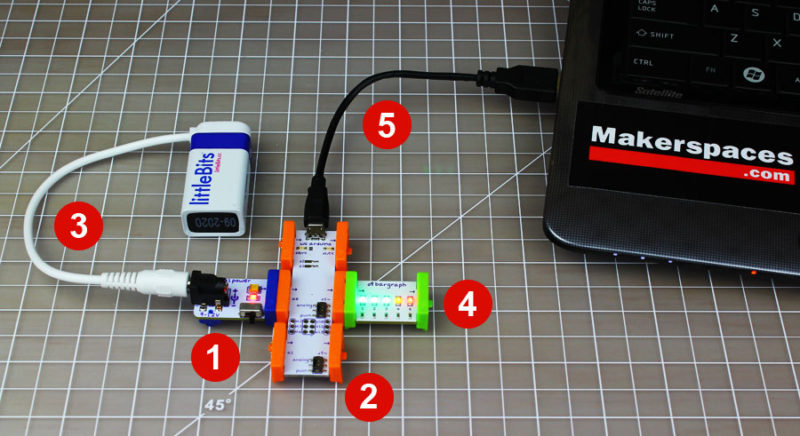
To begin, you will need to connect the power bit (1) to the Arduino bit (2) at the point marked (a- zero). Make sure the 9v battery (3) is attached to the power bit using the power cable. Next, attach the LED bit (4) to the side marked (d5~) and then TURN ON the power bit. The last step is to connect the Arduino bit to your computer (5) using the micro USB cable.
Step 2 – Download Arduino IDE Software
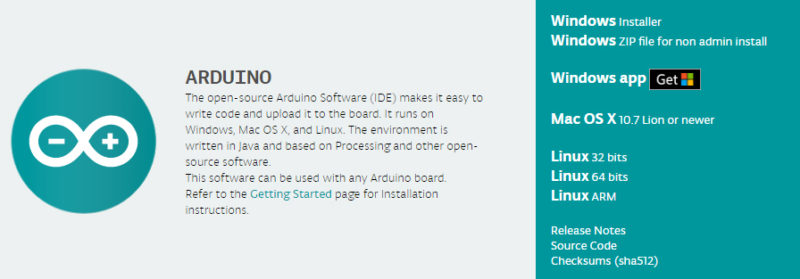
The Arduino IDE is free software that is used to write the code that is uploaded to the littleBits Arduino bit. To download the software, use the following link – www.arduino.cc/en/Main/Software
Select the operating system you have and click on the appropriate link on the right-hand side.
Step 3 – Select The littleBits Arduino Board & Port
Open up the IDE software and make sure the Arduino bit is connected to your computer and the power bit is switched on. Select Tools > Board > Arduino Leonardo
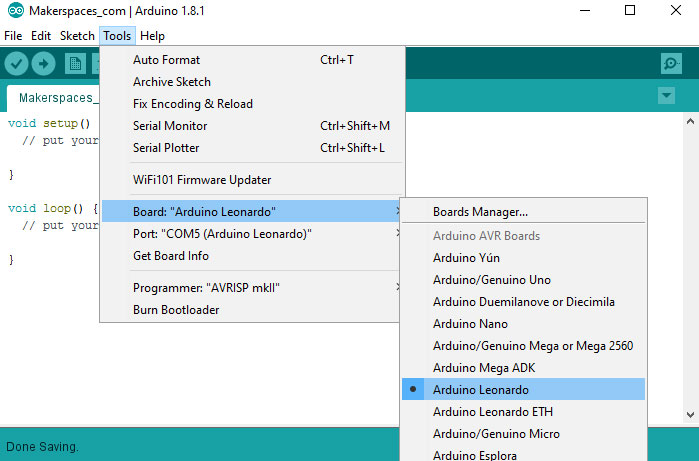
Next you need to select the port the Arduino will be connected to. Go to Tools > Port > ComX (Arduino Leonardo)

Step 4 – Upload Blink Sketch To Arduino Bit
Now it’s time to upload the code (known as a sketch) to the Arduino bit. First, download the below zip file and click extract.
Blink Sketch – Zip File
Open the “Blink” file and click the forward arrow in the top left of the IDE. At this point, the code is being uploaded and the LED bit should start blinking in a few seconds. Try experimenting with the code and change the delay portion from (200) to (1000). What does it do?
Note – In order for the “Blink” file to work correctly, it will need to be located in a folder named Blink. If you want to learn more about the IDE, view our Simple Arduino Projects post.
Project 2- Fade a Bargraph
Now it’s time to create a fading LED bargraph using the littleBits Arduino bit.
Parts Required
- Arduino Bit
- Power Bit
- Battery & Power Cable
- Micro USB Cable
- Bargraph Bit
- Optional – Arduino Coding Kit
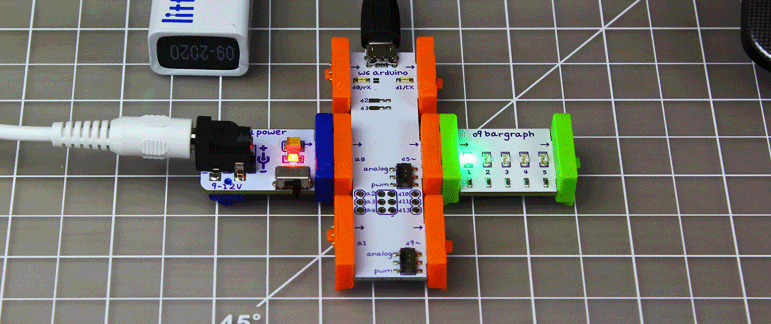
Step 1 – Connect The Bits
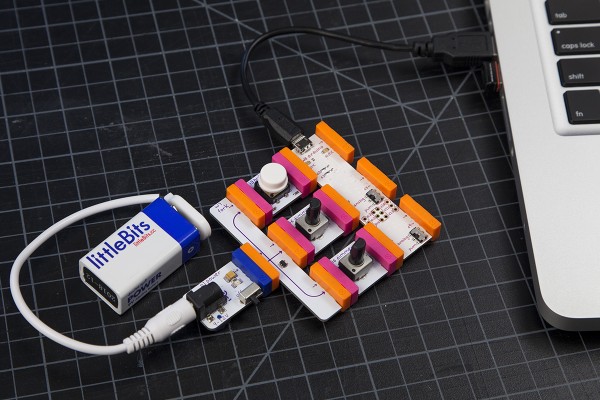
To begin, you will need to connect the power bit (1) to the Arduino bit (2) at the point marked (a- zero). Make sure the 9v battery (3) is attached to the power bit using the power cable. Next, attach the bargraph bit (4) to the side marked (d5~) and then TURN ON the power bit. The last step is to connect the Arduino bit to your computer (5) using the micro USB cable.
Step 2 – Upload Fade Sketch To Arduino Bit
Download the below zip file and click extract.
Fade Sketch – Zip File
Open the “Fade” file and click the forward arrow in the top left of the IDE. At this point, the code is being uploaded to the bit and the bargraph should start fading.
More Arduino Projects
Looking for more beginner Arduino projects that involve littleBits? Check out their getting started section for more ideas. Below are a few examples of what you’ll find.
Share your projects on Twitter @Makerspaces_com