Project Time: 30-45 minutes
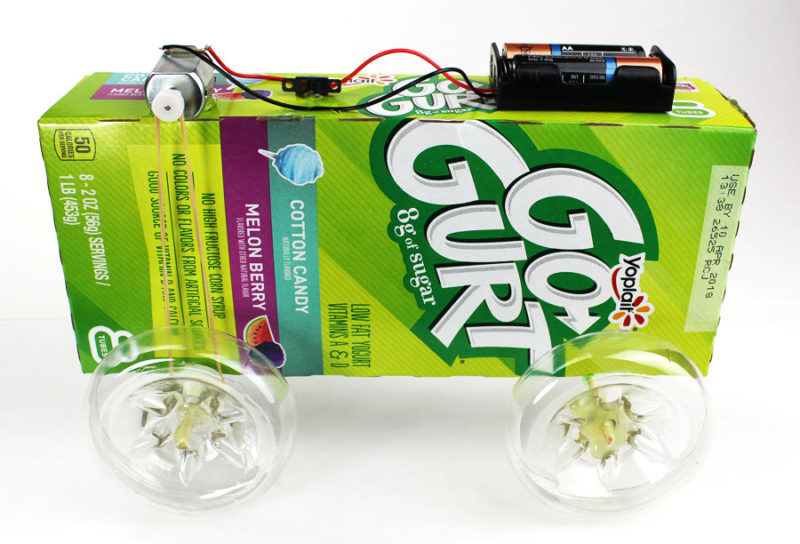
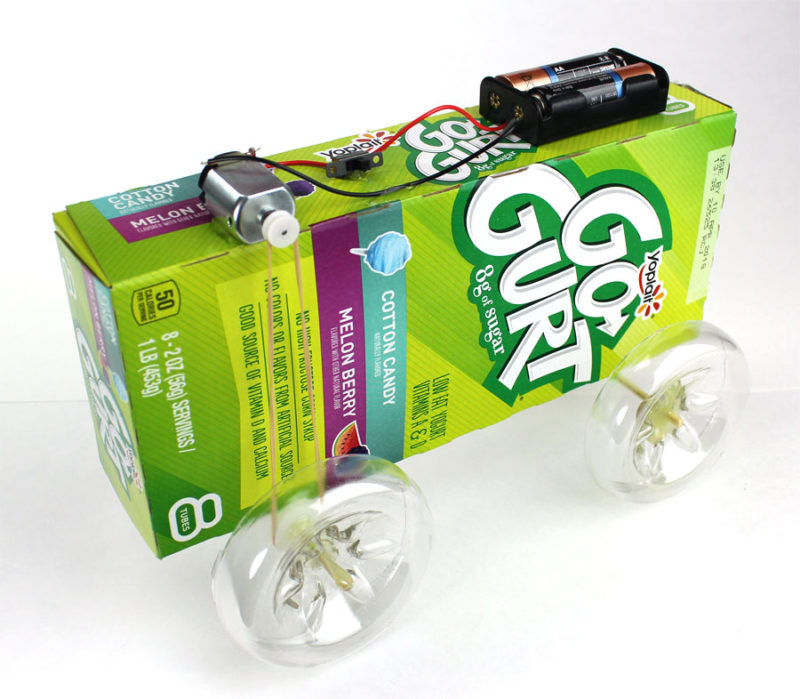
Using everyday and recycled materials, you can create this battery powered car.
Learn how to create a simple circuit using a DC motor, AA batteries and a switch.
Materials Needed
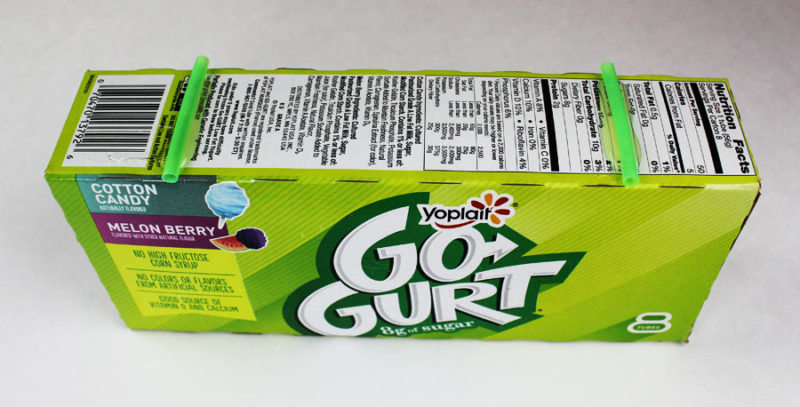
You can use almost any container for the body of this car. From boxes to bottles, this is a project that makes recycling fun.
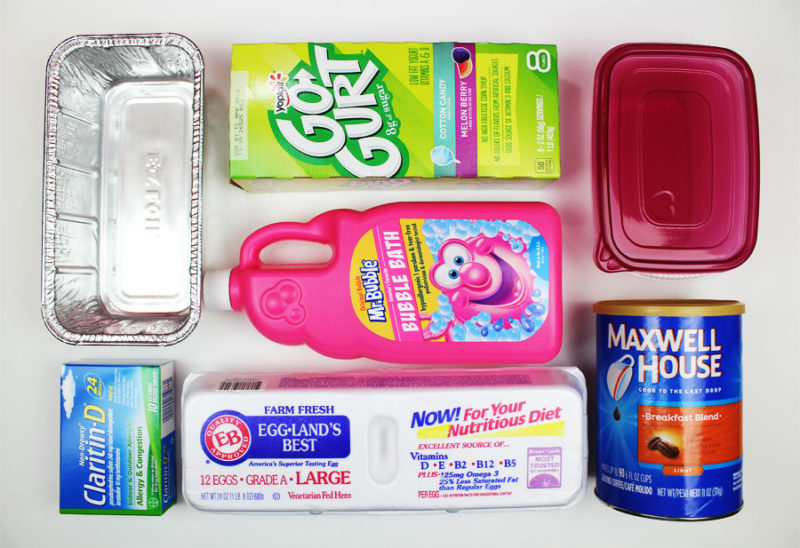
You will need the following materials to make this car:
- Bottle Caps
- Wooden Skewers/Dowels
- Straws
- AA Battery Holder
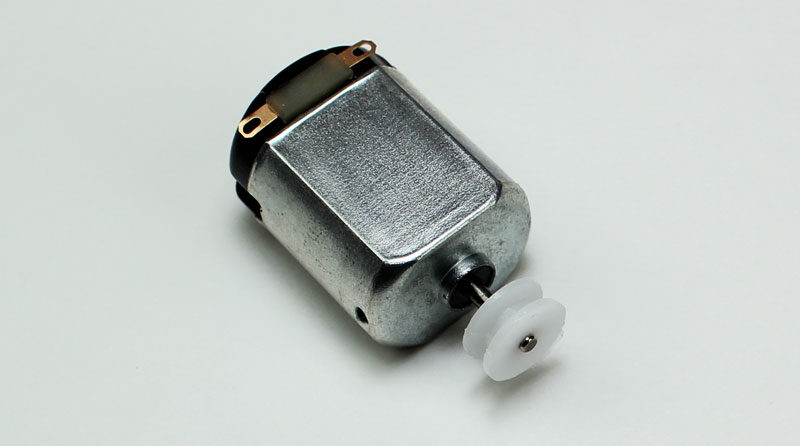
- DC Motor
- Switch
- Plastic Pulleys (shown in white)
- Rubber Band

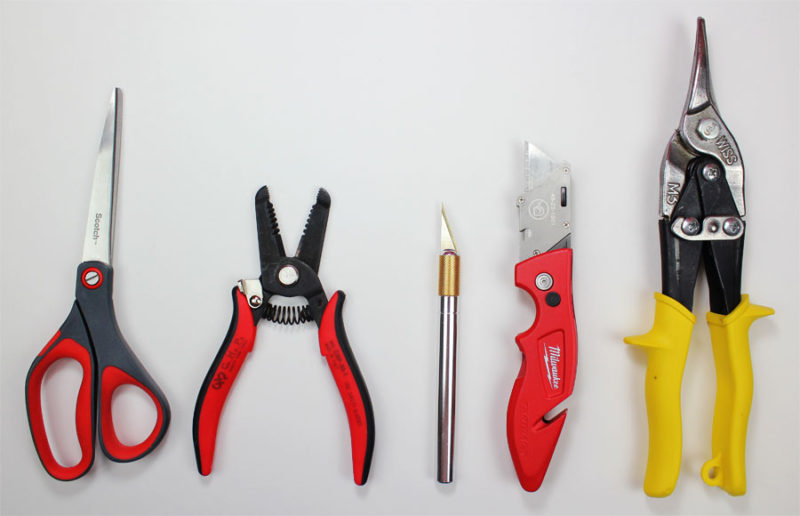
Tools Needed
You don’t need a lot of tools for this project but you will need a few essentials.
- Tin Snips
- Razor Blade or Craft Knife
- Wire Strippers
- Scissors
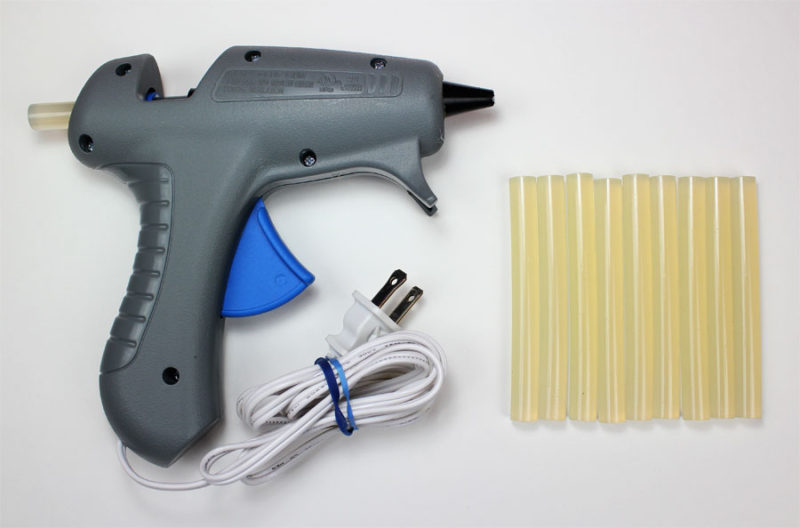
- Hot Glue Gun or Super Glue
Using a hot glue gun is recommended but you can also use Super Glue if you choose.
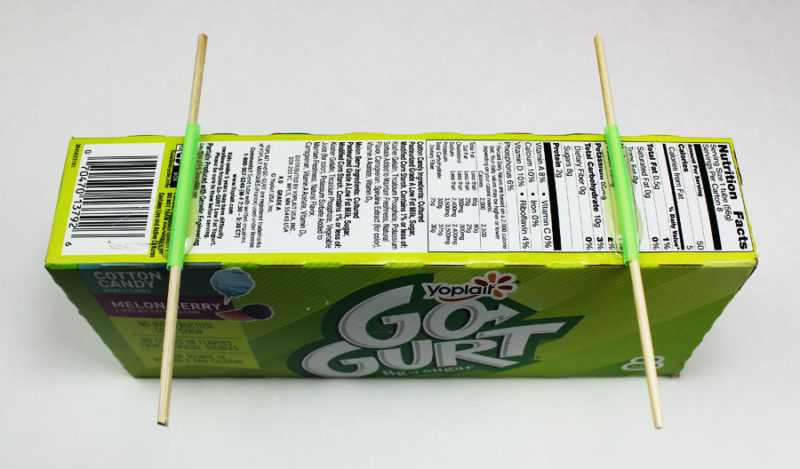
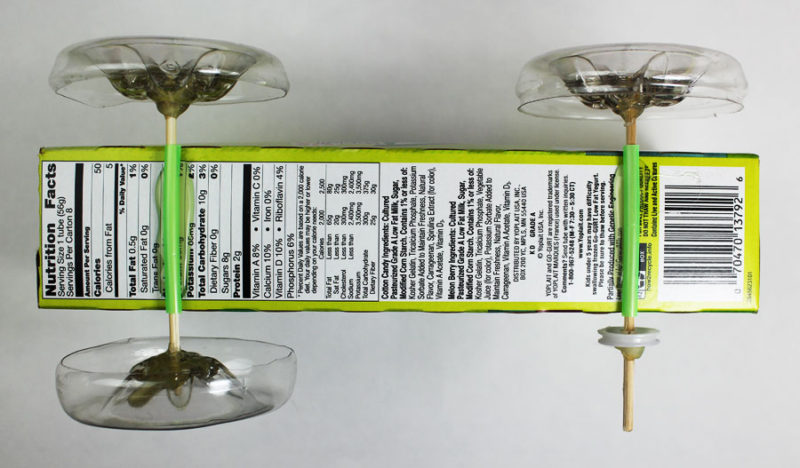
Step 1 – Add Straws
Flip the box over and glue two straws to the bottom. Make sure they are as straight as possible.
Step 2 – Cut The Axles
Next, you need to insert your wooden skewers or dowel rods into the straws. Leave about an inch sticking out on all sides.
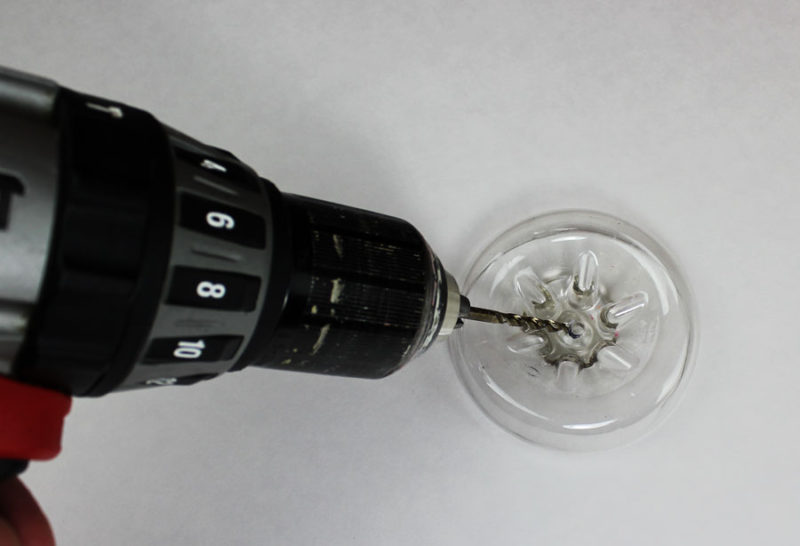
Step 3 – Prep The Wheels
Just like with the car body, you can use a wide variety of items for the wheels. If it’s round it probably will work just fine. For this project we are using a sports drink bottle and will be cutting off the bottom. Bottle caps would work equally well.
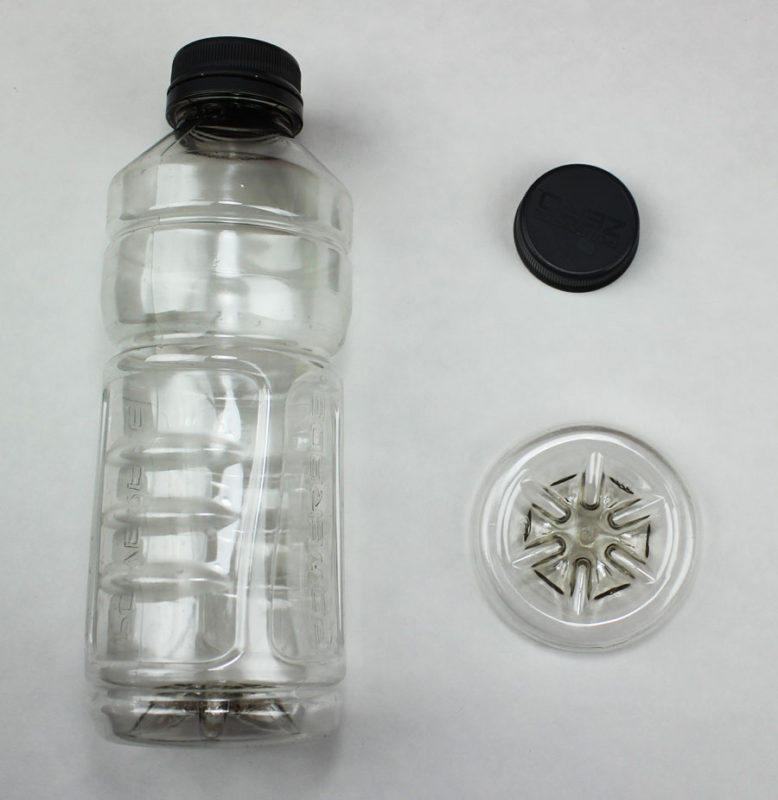
Once you have the wheels ready, you will need to drill a hole in the center. Determine the diameter of your skewers or dowel rods and drill the hole the same size.
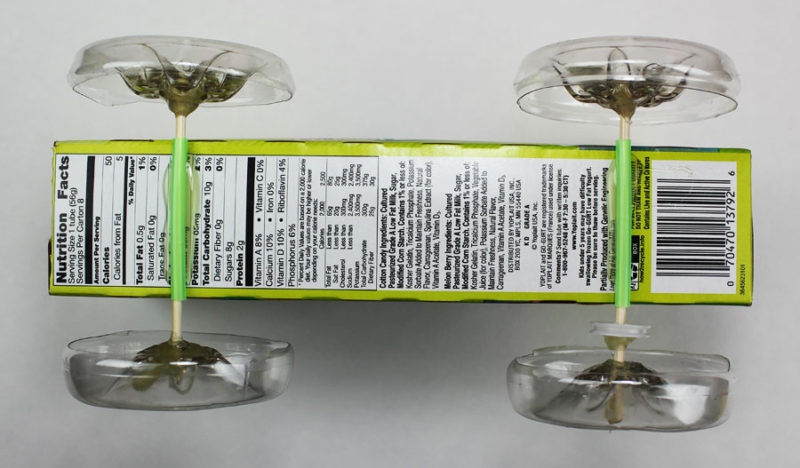
Step 4 – Attach The Wheels
Attach (3) wheels to the axles and then use hot glue to secure. Make sure you hold the wheels straight and vertical while the hot glue cools down. Leave the last wheel off until step 6.
Trim the excess axle using tin snips or other cutter. Make sure to wear eye protection as these small pieces tend to fly when they’re cut.

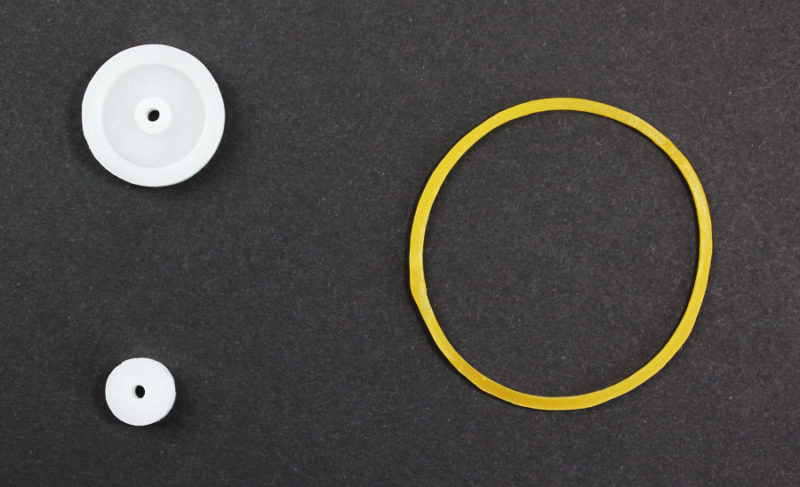
Step 5 – Prep The Pulley
You will need 2 plastic pulleys and a rubber band to make this car move. The size of the pulleys aren’t extremely important. We used a 1/2 inch pulley for the motor and a 2 inch pulley for the axle.
Try doing experiments and see what happens when you use different size pulleys.
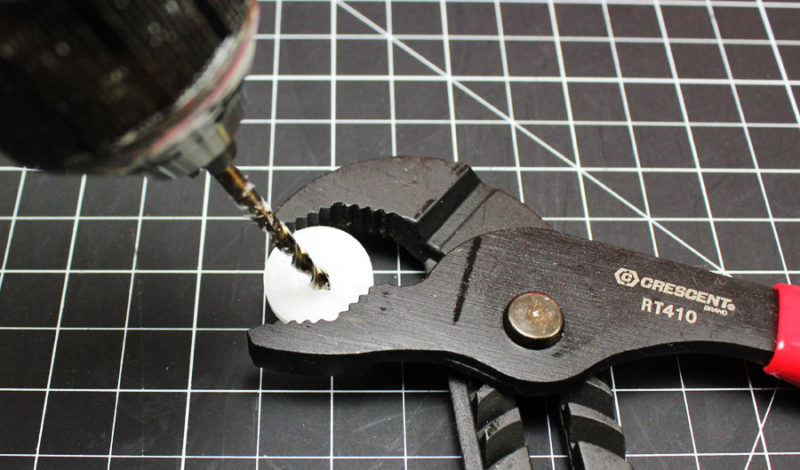
Determine the diameter of your axle (wooden skewer) and drill a hole the same size into the middle of the large pulley.
Step 6 – Attach The Pulley
Slide the large pulley onto the axle where the fourth wheel will be located.
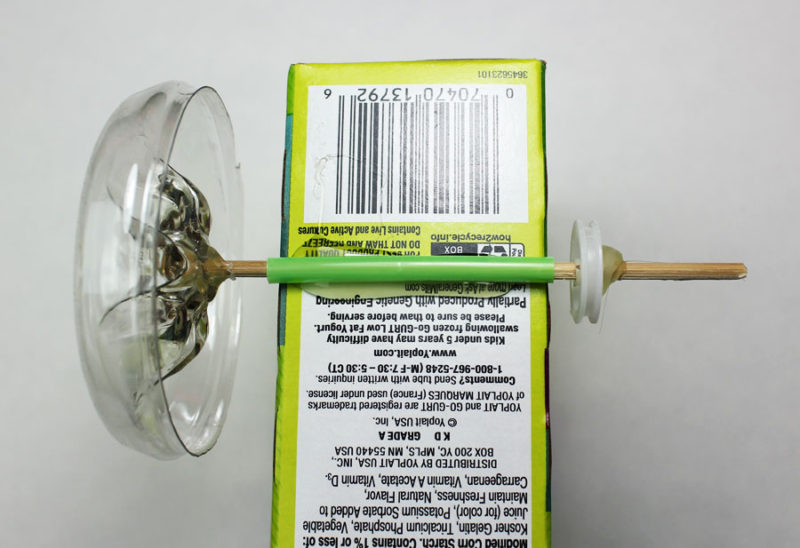
Use hot glue and secure the pulley to the axle making sure it stays straight and vertical while drying.
Step 7 – Attach The Final Wheel
Just like with the pulley and other 3 wheels, slide the last wheel onto the axle and use hot glue to secure.
Step 8 – Attach The Battery Holder
Flip the car over and make sure it rolls without any issues. Glue the battery holder to the side of the box that has no pulley on the axle.
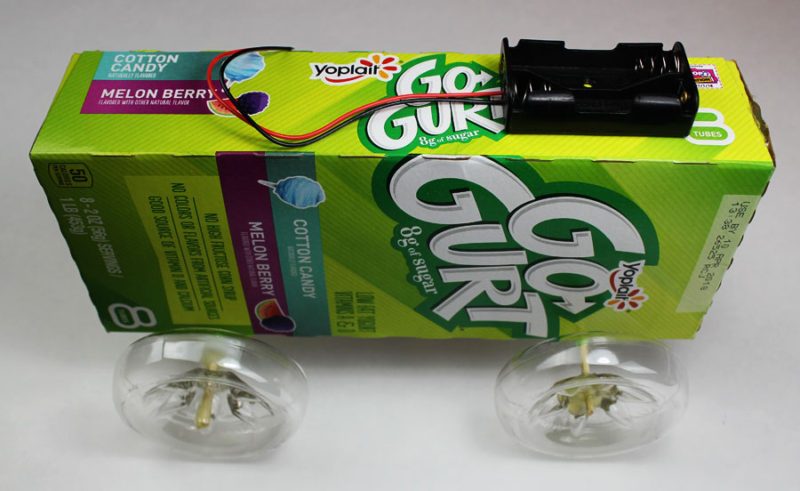
Step 9 – Mount The Motor
Place the small pulley onto the shaft of the motor.
Connect the rubber band to the axle and motor pulley. Make sure the motor pulley is lined up straight above the axle pulley and then glue the motor in place.
Be sure to have the terminals of the motor facing up.

Step 10 – Wire The Motor
Connect the black wire from the battery holder to one of the terminals on the motor.
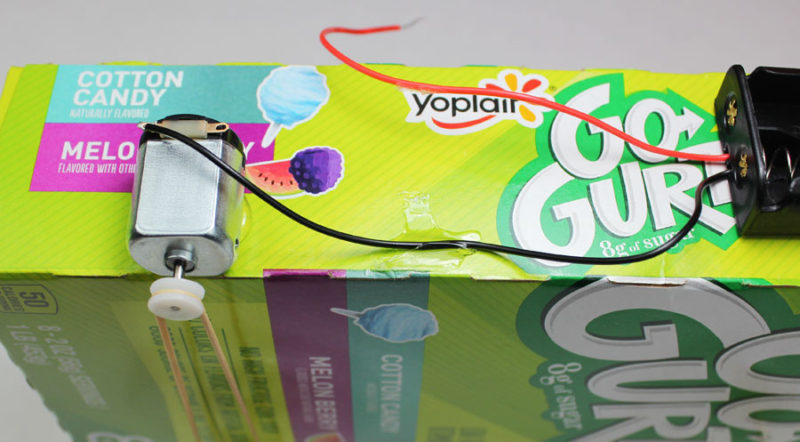
Step 11 – Add The Switch
Connect the red wire from the battery holder to the other terminal on the motor. Twist the wire to secure it.
Cut the red wire in half and strip both ends.
Connect the red wire from the battery holder to the middle hole on the switch.
Connect the red wire from the motor to the hole on the end of the switch.

Glue the switch and any loose wires to the box. If you want a more permanent connection, you can solder the wires in place.
Complete !
All that’s left to do is add batteries, flip the switch and race your friends. Have fun !
Try experimenting with new car designs using different materials. See what you can do to make the car go faster and straighter.
Show us your project
Tweet us at @Makerspaces_com and show us how your car turned out. We love seeing your projects.